• Home
  • Images of the Month
  • My Notes
  • About
  • Contact
    • Privacy Policy

iJourneys

John Gough Photography

Lightroom Presets Using ChatGPT

by John Gough

Lightroom Presets

Lightroom presets are the key to consistent editing and speeding your workflow when post processing your image RAW files. However, presets take time to set up, especially if you want to try different looks or emulate your favourite photographers. So how can you save a ton of time?

Why not use the power of AI and ChatGPT to assist you in designing Lightroom presets for your photography?

Get Some Ideas from ChatGPT about Lightroom Presets

It may be dreamy landscapes or the stark monochrome of David Bailey: a vintage film vibe, or a cinematic recreation.

Start by asking ChatGPT for some ideas, or if you know what you want use ChatGPT to suggest where to start.

For example:
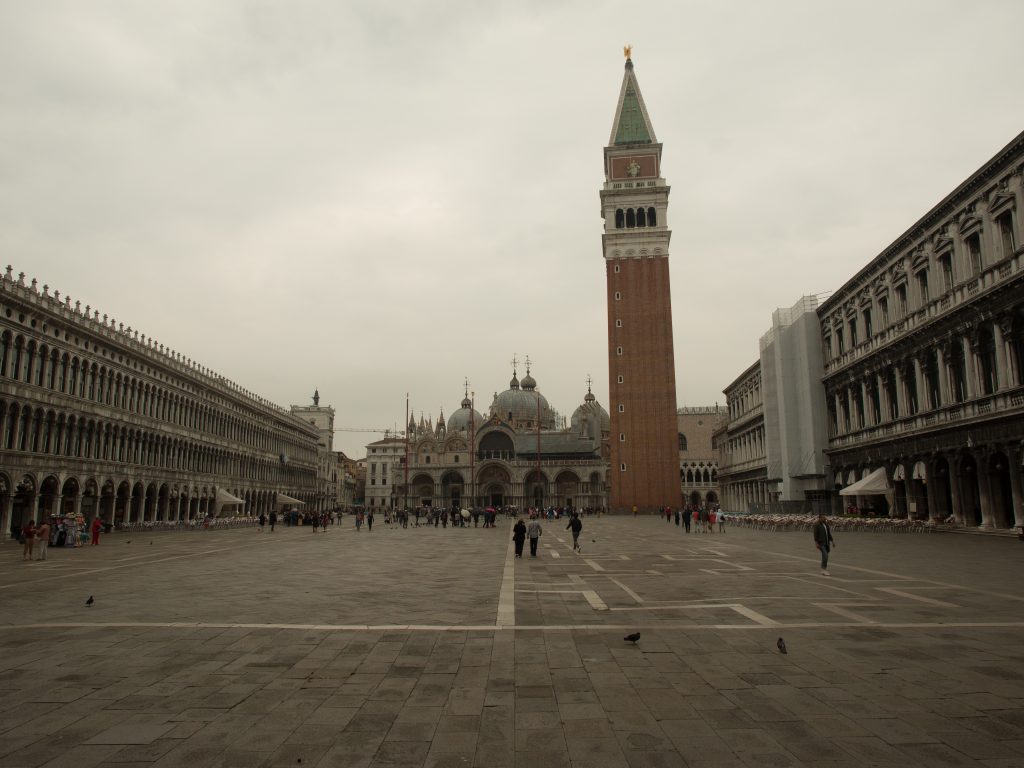
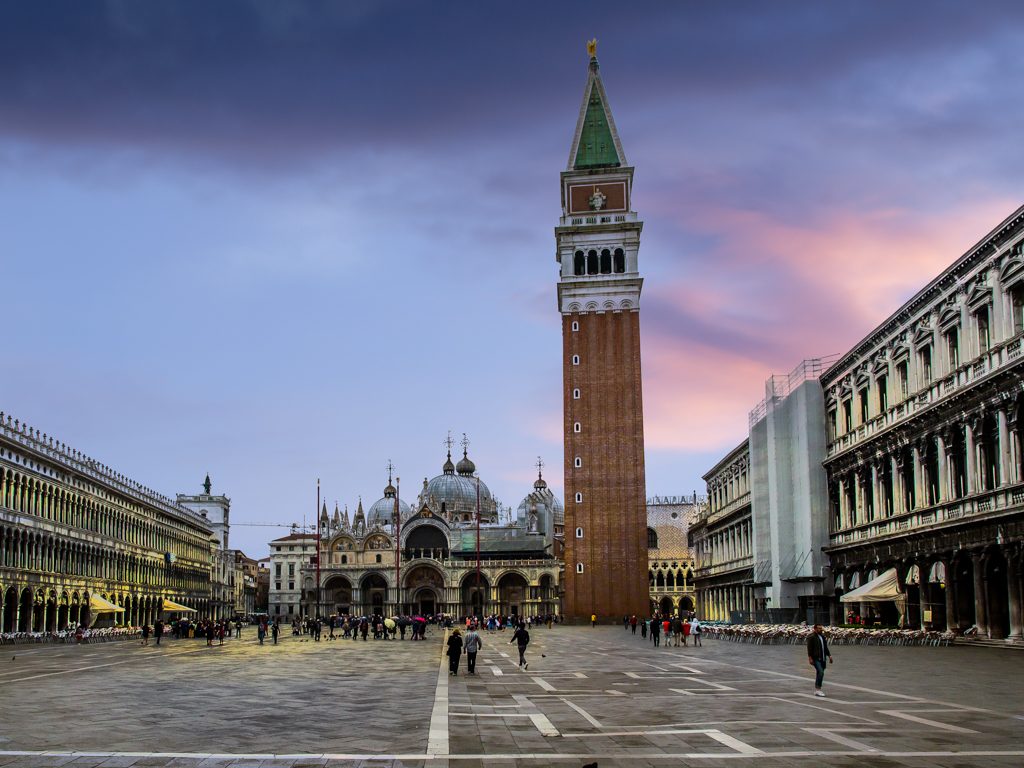
Prompt: “I want to create a Lightroom preset inspired by the vibrant tones of summer evenings. Can you suggest adjustments to colour, tone, and effects?”
ChatGPT’s Response:

  • Increase Vibrance and Saturation by 20-30% for rich colors.
  • Adjust Highlights down (-20) to retain detail in bright areas.
  • Boost Shadows (+15) for a balanced look.
  • Add a warm Temperature shift (+5 to 10) for a golden glow.
  • Slightly increase the Texture and Clarity (+5 each) to enhance details.

Try Out Different Themes or Styles in Lightroom Presets

ChatGPT can also help you create presets based on specific styles, such as “cinematic,” “moody black and white,” or “retro Polaroid.”

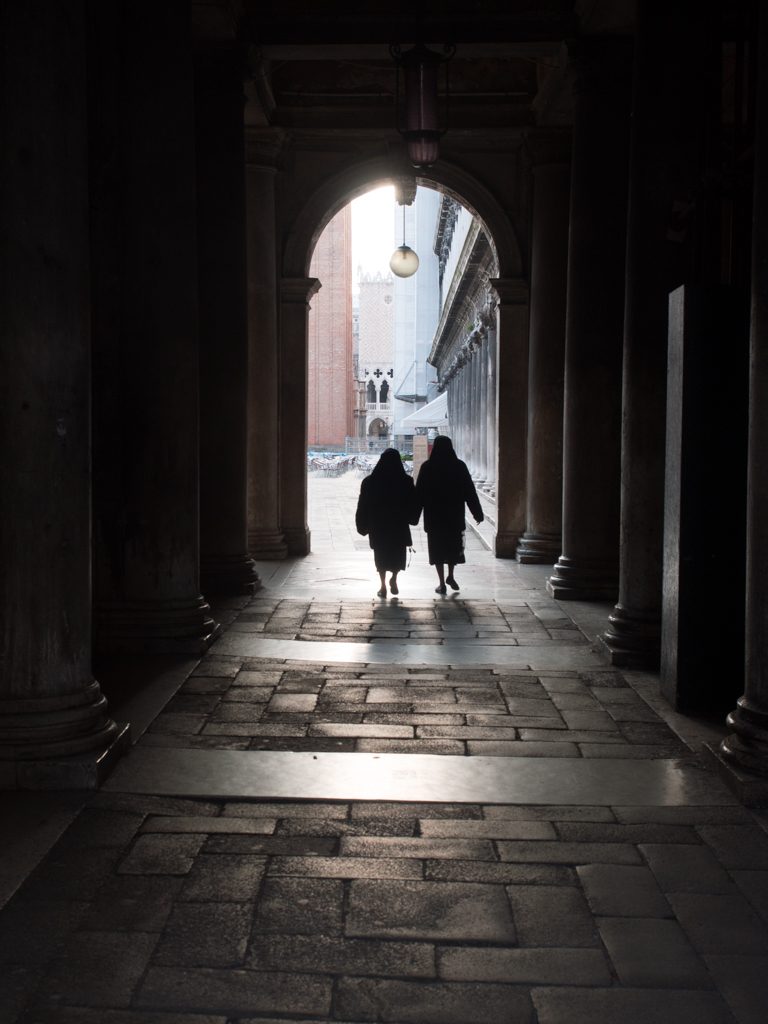
Prompt: “Can you suggest settings for a moody black-and-white preset?”
ChatGPT’s Response:

  • Convert to Black & White.
  • Reduce Highlights (-25) for a soft, dramatic feel.
  • Increase Whites (+10) to add contrast.
  • Decrease Shadows (-15) and Blacks (-20) for depth.
  • Add a subtle Vignette (-10 to -15).
  • Adjust the Tone Curve for an S-shaped contrast boost.

Get a Detailed Lightroom Preset Description

If you ask ChatGPT for detail, it will offer a specific Lightroom preset description. Here is one I requested to recreate the style of the UK social documentary photographer, Martin Parr.

Basic Settings

  • Exposure: Adjust to match the scene, keeping it slightly bright (+0.10 to +0.20).
  • Contrast: +25
  • Highlights: -10 (to retain detail in bright areas like skies).
  • Shadows: +20 (to lift dark areas while preserving some depth).
  • Whites: +10
  • Blacks: -15 (to create deep, rich blacks).

Tone Curve

  • Highlights: Lift slightly to brighten light tones.
  • Lights: Increase for midtone contrast.
  • Darks: Decrease to deepen shadows.
  • Shadows: Lift slightly for a soft matte effect.

Final Curve: A subtle S-curve for contrast, with a slight lift at the shadows.

HSL Panel

Hue

  • Reds: -10 (for warm, natural skin tones).
  • Oranges: -5 (minor tweak for richer tones).
  • Yellows: -5 (to lean toward golden highlights).
  • Greens: +10 (to make grass and foliage more vibrant).
  • Blues: -5 (for deeper skies).

Saturation

  • Reds: +20
  • Oranges: +15
  • Yellows: +20 (for punchy highlights).
  • Greens: +25 (for vivid foliage).
  • Blues: +15 (for rich skies).
  • Purples/Magentas: +10 (subtle but balances overall tones).

Luminance

  • Reds: +10
  • Oranges: +5
  • Yellows: +10
  • Greens: +15
  • Blues: -5 (to give skies a bit more depth).

Color Grading

Shadows:

  • Hue: 230 (blue tones)
  • Saturation: 10 (just a hint for depth).

Midtones:

  • Hue: 60 (yellow-green tones)
  • Saturation: 15 (to warm midtones).

Highlights:

  • Hue: 50 (gold tones)
  • Saturation: 20 (for a sunny, nostalgic glow).

Blending: 60

Balance: +10 (favour highlights).

Detail Panel

  • Sharpening: Amount: 60, Radius: 1.0, Detail: 30, Masking: 10.
  • Noise Reduction: 10 (retain texture but clean up any noise).

Lens Corrections

  • Enable Profile Corrections.
  • Remove Chromatic Aberration.

Effects

  • Dehaze: +5 (adds subtle depth).
  • Vignette: 0 (avoid heavy vignettes; Parr’s style is clean).

Lightroom Presets as an xmp File

ChatGPT can also create an XMP file, which you can upload directly to Lightroom. If you don’t know how to upload the file, just ask ChatGPT.

Conclusion

AI is changing photography, as it is in all fields of endeavour, and we photographers are just getting to grips with its potential. Like it or not in five years it will be part of our lives. The trick will be to work with it, not for it.

Using AI we can work smarter and speed up our workflow. Lightroom can only help develop our creativity, and eventually, the sliders in Lightroom will be a thing of the past.

Filed Under: Journey, Lightroom

Canon RF 24-240mm Lens Review

by John Gough

Canon RF 24-240mm lens

This is a review of the Canon RF 24-240mm lens. It is a true and accurate reflection of using my own lens in the field over several weeks.

Disclaimer

Let’s get one thing clear. I am reviewing a lens that I bought here in the UK. I have not been given the lens to review and I have not been on some Canon junket to write about the lens. This is my honest view.

Research on the Canon RF 24-240mm Lens

A big part of the fun of buying any photography equipment is the research before you buy. I shared my research on these pages both here and here.

Venice

I recently went to Venice which is a photographers paradise. I was shooting landscape and people. Although I took other lenses with me, the Canon RF 24-240 lens remained on my camera for most of the trip.

The flexibility of 24mm to a whopping 240mm is a joy. There is no thought that you may miss a shot because you don’t have the right lens. Just relax into shooting, confident that when the opportunity arises the lens can cope.

Quality of the Images

This is not an L lens so some photographers may worry that it is not top quality. In my view that may have been a problem in the past with the old EF mount. The new RF mount seems to have allowed Canon designers more flexibility to produce a better quality lens to fit the guide price. If this lens produces brilliant quality and it does, the RF L lenses are no doubt phenomenal.

However, I am not about to spend £2600 on a Canon RF 70-200mm F2.8L IS USM. When I could have three Canon RF 24-240mm lenses for the same price.

Restorante Pizzeria / John Gough / Canon EOS R

The image above is an example of the image quality. Taken at f9 at 1/1600 sec. It is possible to read the headlines on the gentleman’s newspaper and the papers in the shop doorway.

Minimum Aperture on the Canon RF 24-240mm lens

The minimum aperture on this lens is f4-6.3, which I imagined would be an issue. However, the image stabilisation on this lens more than offset that concern immediately. Canon claim it is five stops.

Gondolas Venice / John Gough / Canon EOS R

The image above was captured at 0.6 seconds in the early morning. There is no shake visible.

Distortion and Vignetting

Distortion and vignetting are apparent on this lens and was certainly a reason for some reviewers to unfairly criticise the lens. In my view, lens distortion is not a problem. As I wrote in an earlier post here.

Superzoom lenses are fantastically convenient, but notoriously difficult to build. As a result Canon have taken a leaf out of Apple, Samsung and Hauwie’s playbook and made a good lens a great lens with the addition of sophisticated algorithms.

24mm RAW Image with distortion
Corrected in Lightroom

As shown above, the RAW image is corrected perfectly in Lightroom. Just remember to include in presets or build into a workflow. The in-camera software will automatically do the same for JPEG images.

Usability

The lens is light considering the amount of glass at just 750g and feels well balanced on the R. It is plastic but feels solid and the zoom ring is smooth in operation.

The zoom ring can double as a control ring using a switch on the side of the lens. The control ring is one of my favourite features of the RF system. I set mine to exposure compensation.

Focussing with the silent Nano USM motor is fast. I did not experience any hunting.

It would be useful if the lens was weatherproofed.

Conclusion

As a street and urban photographer, this lens is perfect for wandering the streets and capturing people and situations. When you get to work with a 10x zoom, you have got to ask yourself, ‘Is it really worth carrying a bag of expensive lenses with you?’

This is not just a travel lens it is an everyday lens. I know I use it every day.

UK

USA


Camera Wrist Strap

I have avoided dropping my camera so many times using a simple inexpensive wrist strap like this one. Cameras and expensive lenses do not bounce!

UK

USA


Filed Under: Canon Cameras, Canon EOS R, Equipment, Gear, Journey, Lightroom Tagged With: Canon Cameras

Joshua K Jackson

by John Gough


Joshua K. Jackson is a British photographer based in London, Working in colour, photographing everyday life in the capital. His work has been published worldwide and exhibited in the UK, USA and Europe.

Check out this series of videos about street photography and the work of Joshua K Jackson, promoted by Adobe.


Camera Wrist Strap

I have avoided dropping my camera so many times using a simple inexpensive wrist strap like this one. Cameras and expensive lenses do not bounce!

UK

USA


Filed Under: Journey, Lightroom, Photographer, Photography Tagged With: photographers

Silver Efex Moody Monochrome

by John Gough


silver efex

Coffee at The Mitre / John Gough / Sony a6300

I was out and about in Cambridge yesterday with my camera, and I was accosted by an elderly lady. She thought that because I was carrying a camera, I must be a snoop from the council. That is just one of the hazards of street photography. Had I been carrying a big DSLR, she would have assumed I was a proper photographer. However, a small camera like the Sony a6300 can unfortunately make you seem like a furtive fellow.

The picture above was taken there. The couple look delighted to have been caught on camera. I was having a good day!

The Google Nik Collection including Silver Efex Pro2

I created the moody monochrome image using Silver Efex Pro2, from the Google Nik Collection.

The Google Nik Collection is the best free resource for photographers available on the web. In 2016 when Google decided not to support the software further, it went on to provide the software free to photographers. This was both good and bad news. The software was free, but it was never going to to be updated. However, a month or so ago it was agreed that DxO acquire the Nik Collection, and fortunately they plan to continue to develop it. A revised version will be available mid 2018.

It is still possible to download the existing software, including Silver Efex for monochrome post processing here.

Silver Efex Pro2

This is a note to myself about how the image was processed.

Lightroom

In Lightroom, there are the usual workflow: exposure, sharpness and white balance adjustments to process from RAW. The image was then desaturated to -31, the vibrance taken down to -29 and the clarity pushed up to +71. Reducing the colour to provide a dark and moody presence.  I also added a shallow tone curve and imperceptible vignette.

Photoshop

Removed the reflection of myself and used the burn tool to tone down the interior of the pub, reducing lights and reflections.

Silver Efex

Processed to mono using preset 23 Wet Rocks and film type Agfa APX Pro 100.

Conclusion

To achieve that look, without Silver Efex would be impossible for an amateur retoucher like myself. Furthermore, in the distant analogue days it would have taken hours of work in the darkroom to achieve the same results.


Learn more:


Filed Under: Journey, Lightroom, Nik Collection, Photography, Photoshop, Post Processing, Silver Efex, Sony a6300, Street Photography Tagged With: Post Processing

How to Make Your Photos Pop

by John Gough

I recently entered an event at Bedford Camera Club, where we were presented with six photographs in RAW. Our objective was to process three images and present back how we did it. These are my notes, about how I went about trying to make these photos pop in Lightroom and Photoshop. I have not explained the technical details, but I have included some links to all the technical information..

Amazon have a good deal on Lightroom and Photoshop at the moment:


Image 1. How to make Your Photos Pop

This is the first image in RAW. Looks very drab and ordinary, BEFORE processing.

How to make your Photos pop

Image 1 BEFORE

The Issues with this Image

The picture is grey and washed out. There is no detail in the sky. There is no real focus on what the subject is. There is too much foreground. The edges are messy. The detail in the pebbles and brickwork are lost.

Processing in Lightroom and Photoshop

  1. Import the RAW file to Lightroom CC.
  2. Crop to A4 (Custom size 2.1 x 2.97) tightening the view to concentrate on the fishing boats. Excluding the motor boat on the right.
  3. Straighten the horizon. The roof in the background is not flat
  4. Check exposure. This image looks around a third of a stop under exposed
  5. Add contrast to make the image less flat
  6. Launch a Develop Lightroom preset. Here we are using my user preset for landscape
    1. Highlights -100 Shadows +100
    2. Adjust the whites and blacks by holding down the alt key (Windows)
    3. Move the Clarity / Vibrance / Saturation sliders to suit the effect required.
    4. Tone Curve.  Again to suit effect. Try an S curve
    5. Sharpening and Luminance around 30-45
    6. Tick Lens Correction and Enable Profile Correction
  7. Check the white balance. Take the dropper and pick a neutral grey colour. This will set the white balance.
  8. Move the image to Photoshop. Photo>Edit in>Edit in Photoshop CC
  9. Clone out the distracting speed boat on the right.
  10. Use the Dodge Tool to lighten the foreground and under the boats
  11. Use the Burn Tool just to add some detail back into the buildings and the decks of the boat
  12. To replace the sky. Erase the existing sky. Select>Colour Range>Fuzziness c’139. NB this method avoids having to somehow cut around the masts and rigging
  13. Use Erase tool to take out any remaining sky.
  14. Select an image with sky and add as a layer. Blend with the existing layer
  15. In Photoshop save. Image then available in Lightroom
  16. In Lightroom recheck the white balance / exposure /contrast etc for the new merged image
  17. Add a Post Crop Vignette that is there but not visible e.g. -14
  18. Save the image as a JPG

How to make your photos pop

Image 1 AFTER


Image 2 How to make Your Photos Pop

This is the second image in RAW. At least there is some interest in this image, but despite the magnificent architecture, it is drab and unexciting.

how to make a photo pop

Image 2 BEFORE


The Issues with this Image

This image has an odd sepia cast, as if the white balance needs correction. The detail in the sky is probably not worth trying to recover and could be replaced. The picture is dark and lacks detail. There is no real focus on the subject, the photograph is not about the two pigeons in the foreground.

Processing in Lightroom and Photoshop

  1. Import the RAW file into Lightroom CC
  2. Crop to A4 and lose the foreground
  3. Check exposure. This image looks around a third of a stop under exposed
  4. Add contrast to
  5. Launch a Lightroom preset (see above)
    1. Clarity / Vibrance / Saturation important to get some colour from the bland landscape.
    2. Manipulate the tone curve to get some detail
  6. The tower looks as though it is leaning backwards
    1. Go to the Transform tool
    2.  Use the vertical slider to -20 to correct
  7. Move the image to Photoshop. Photo>Edit in>Edit in Photoshop CC
  8. Use dodge and burn tools to create different light in the piazza, and to the buildings left and right
  9. Erase the sky. Select>Colour Range>Fuzziness (see above). This will preserve the building tracery on the buildings to the left and the spires and crosses
  10. Select an image with sky and add as a layer. Blend with the existing layer
  11. In Photoshop save. The image is then available in Lightroom
  12. In Lightroom recheck the white balance / exposure /contrast etc for the new merged image
  13. Add a Post Crop Vignette that is there but not visible
  14. The image still has an orange cast so recheck the white balance. The foreground piazza looks as though it should be grey so use the dropper to sample colour there.
  15. Save the image as a JPG

photos pop

Image 2 AFTER

Image 3 How to Make Your Photos Pop

This is the third image in RAW. There is a picture in there somewhere trying to get out.

photos pop

Image 3 BEFORE

The Issues with this Image

The detail in the columns is lost. There is no real colour so would it be better in black and white? The portrait mode makes the picture mostly pavement. The two nuns should be made the focus of the image.

Processing in Lightroom, Photoshop and Nik Silver Efex Pro2

  1. Import the RAW file into Lightroom CC
  2. Crop to A4 and change from portrait to landscape. That way we focus on the ladies walking and lose the black shadow overhead. Place ladies in the centre of the rule of thirds grid
  3. Check white balance/exposure/contrast
  4. Apply a Lightroom preset (see above)
  5. Move the image to Photoshop. Photo>Edit in>Edit in Photoshop CC
  6. Use dodge tool to reveal the detail in the columns and paving.
  7. In Photoshop save. The image is then available in Lightroom
  8. Move the image to Nik Silver Efex Pro2 which you can download for free here. Photo>Edit in>Edit in Siver Efex Pro2
  9. Select a preset from the preset library in Silver Efex.
  10. Save to move image back to Lightroom
  11. Add a Post Crop Vignette that is there but not visible
  12. Save the image as a JPEG


I am fascinated by digital post production. However, I am still very much in the foothills in the journey to master Photoshop especially. If you want to see just what can be achieved, look at the books and videos of Glyn Dewis.


Filed Under: Journey, Lightroom, Nik Collection, Photography, Photoshop, Post Processing, Silver Efex Tagged With: Post Processing

Fujifilm X-Trans Sensor Problems

by John Gough

I just wanted to add to the debate about the Fujifilm X-Trans sensor which is the APSC sensor used in Fujifilm X series cameras like the XT2, XT20 and XPro2.

The debate which rages on countless forums, centres around the artefacts that can be found on RAW files after they have been processed in Lightroom. Photographers claim that there can be worm like backgrounds and smeary images on high ISO images. Other Fuji users claim never to have come across this problem. Well I did.

Examples of X-Trans Sensor Problems

Here are a couple of examples shown at high magnification taken on a Fuji XT20 at just ISO640.

X-Trans

X-Trans Sensor Worms


X-Trans

X-Trans Smears

Although the sensor is claimed to be 24 MP, and that size of sensor should be able to create up to a c’3′ x 2′ print. I would not like to rely on it if details like these were  evident. Therefore creating fine art prints with this camera is not going to be possible.

The Technicalities: Fuji X-Trans Sensor

To understand the technicalities of why this is. Then refer to this excellent article.

https://petapixel.com/2017/01/27/x-trans-promise-problem/


Conclusion

The answer to the problem many people argue in forums is not to process Fujifim X-Trans images in Lightroom, users suggest instead to use  Capture One. Surely however, there is something seriously wrong when one of the world’s most popular cameras, can not use the world’s most popular processing engine and workflow.


Where to Buy Your Equipment

I buy my equipment from Wex because of their exceptional customer service. I once returned a camera after 30 days, and the next day they called to return my money to my account. Their prices are always competitive and they offer good prices on the trade in of your used gear


Filed Under: Fujifilm, Gear, Lightroom Tagged With: Fuji Cameras

Portraits in Lightroom

by John Gough

A note to myself, this is an excellent tutorial for processing a portrait in Lightroom. Until now I had always assumed that these tools were only available in Photoshop and required masking and layers, but  this portrait is handled from start to finish in Lightroom. Impressive cloning too towards the end. Well done Marc Webster.

Filed Under: Lightroom, Photography, Post Processing Tagged With: Post Processing

Copyright: John Gough 2025