• Home
  • Images of the Month
  • My Notes
  • About
  • Contact
    • Privacy Policy

iJourneys

John Gough Photography

Elliot Erwitt

by John Gough


Elliot Erwitt

Elliot Erwitt

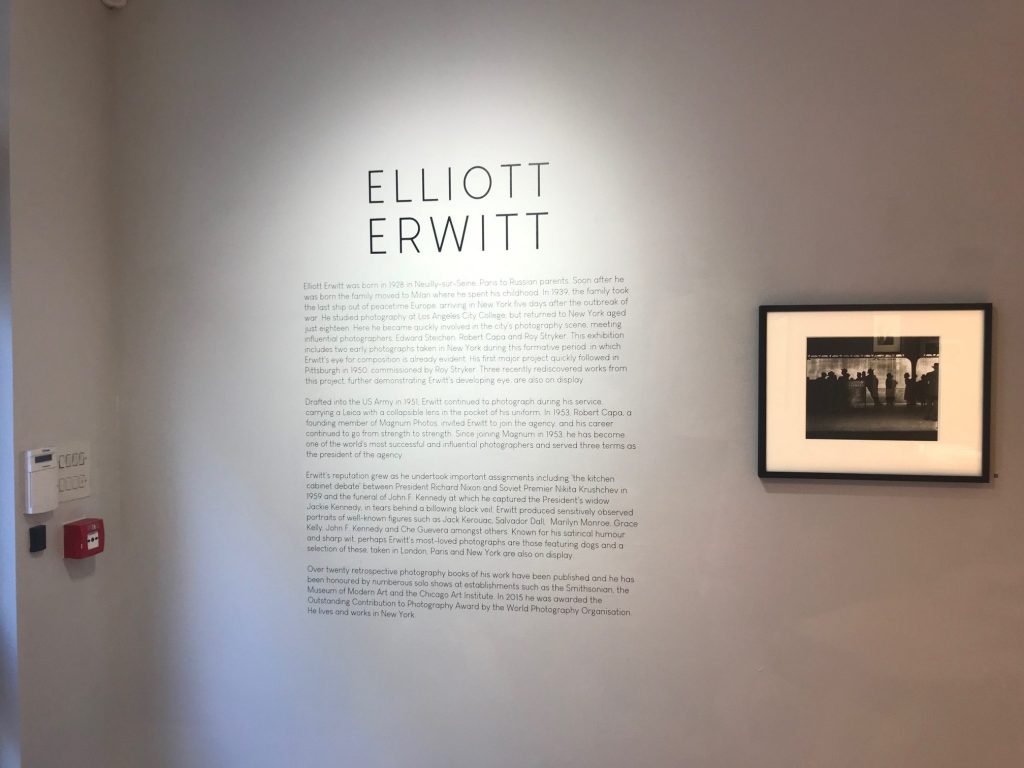
At Huxley-Parlour, there is an exhibition of the work of Elliot Erwitt until Feb 17th. If like me you are a bit fuzzy about his photography, enter the gallery and walk straight ahead until confronted by a sublime portrait of Marilyn Monroe. Priced at between £4000 and £11,500 depending on the size, signed and a direct silver gelatin print from the original negative. You will be convinced you should buy it whether you can afford it or not.

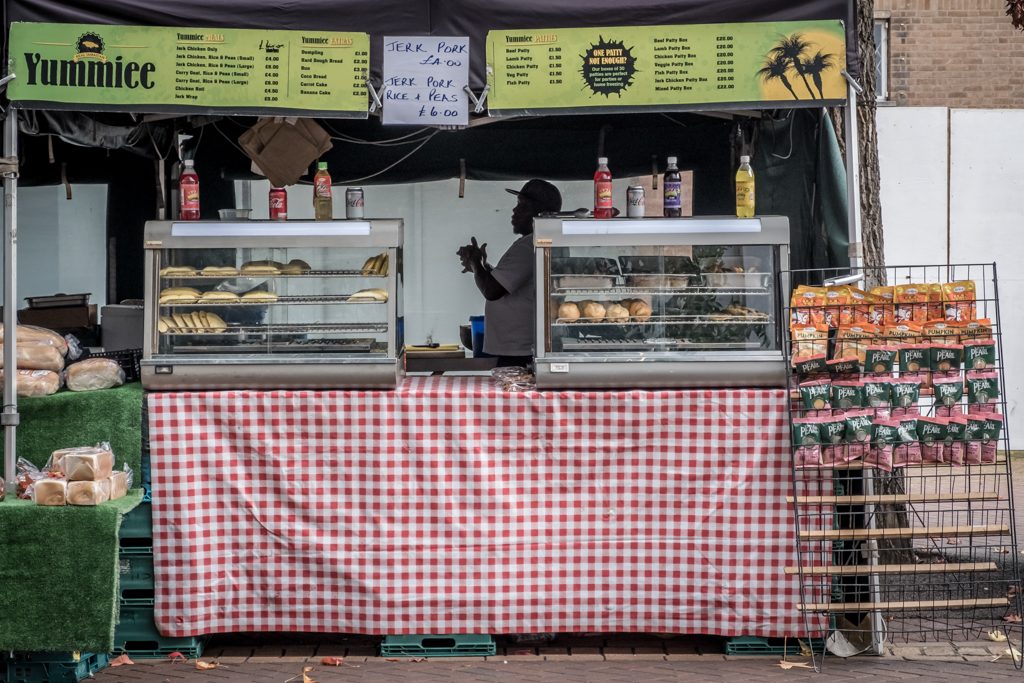
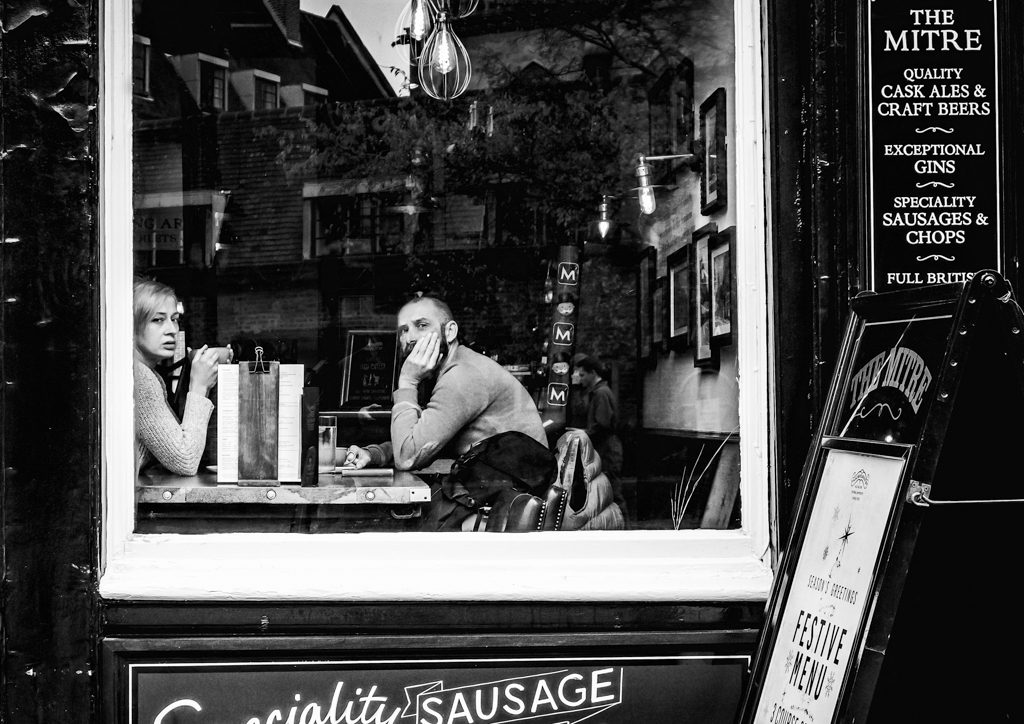
I have collected some of the images in the exhibition here.

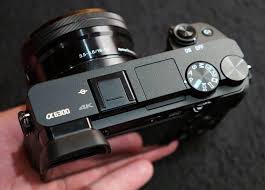
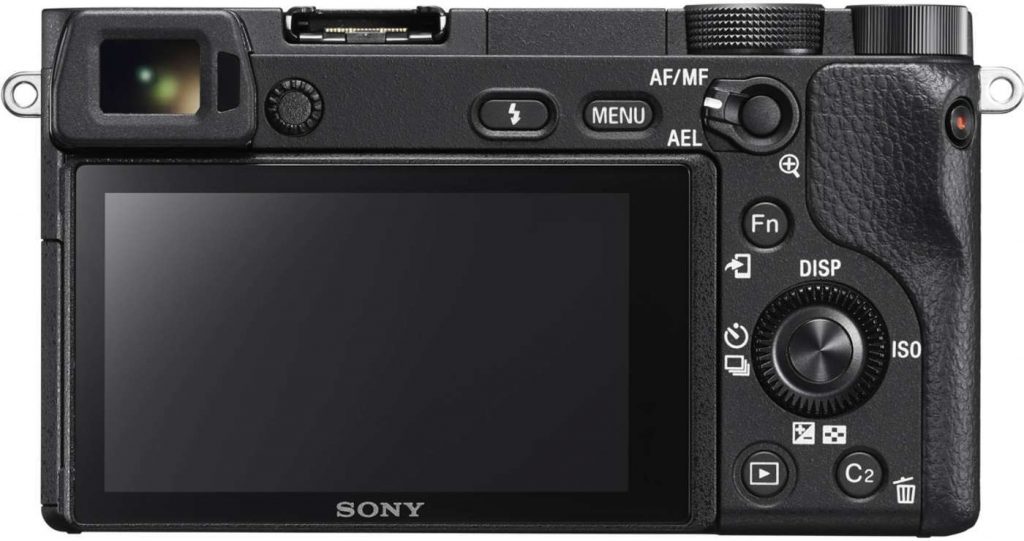
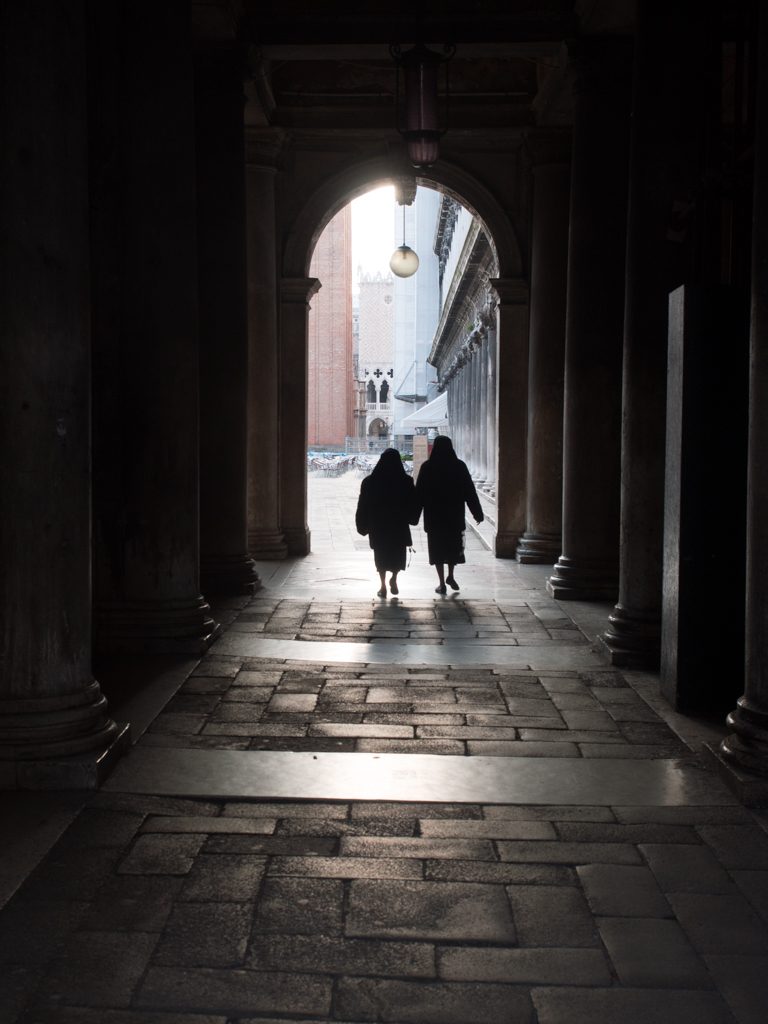
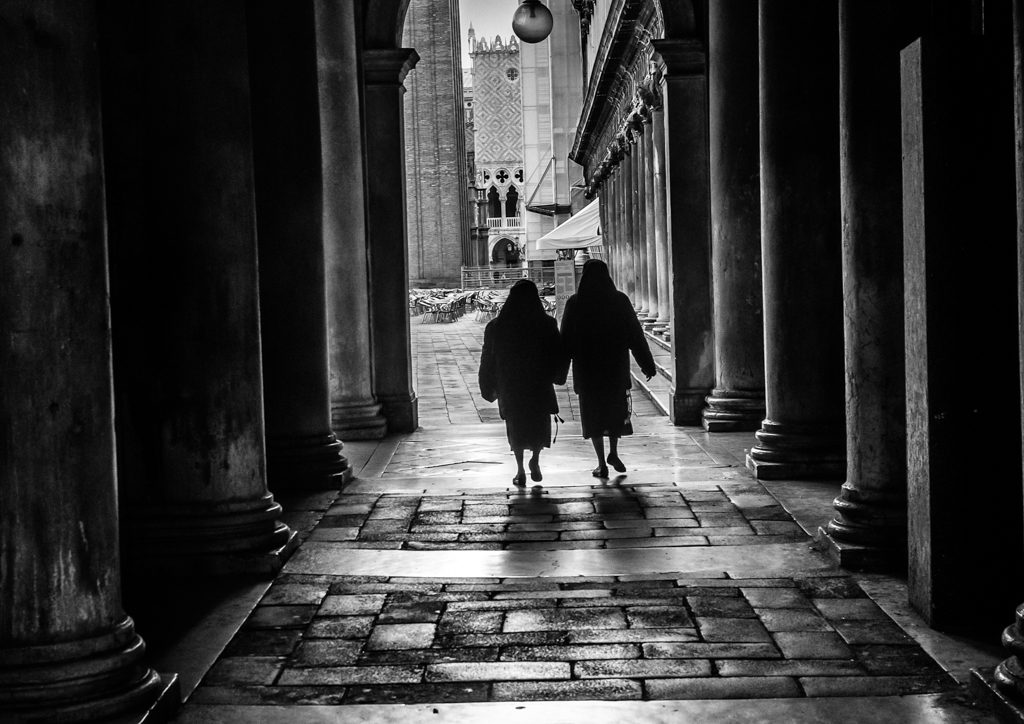
Erwitt was one of the first to join Magnum Photos in 1953 and was in the distinguished company of Capa, and Cartier-Bresson. Erwitt throughout his career carried a ‘hobby’ camera, a Leica M3 with a 50mm standard lens, loaded with Kodak Tri-X or Ilford HP4 film. He called these pictures his ‘snaps’, captured with humour, sarcasm and incongruity. He was a street photographer before the term was invented, just using the power of his own observation.

photography is an art of observation. It has little to do with the things you see and everything to do with the way you see them.

Elliot Erwitt


Filed Under: Exhibitions, Journey, Photographer, Photography, Street Photography Tagged With: photographer

Give Your Images Away with Unsplash

by John Gough

Unsplash

Mountain Biker / John Gough / Canon 6D


The other day my son asked if he could use my image Billboards for a new site he was developing. Yes, of course, no problem.

It got me thinking. If you are prepared to let family and friends, use your images then why not let anyone use your images. I have been fortunate enough to sell some photographs, but that is the small tip of a very big iceberg. Below the waterline, there are thousands of images languishing on my hard drive which will never again see the light of day.

Could these be of use to somebody?

What is Unsplash?

Last week I gave it a try using Unsplash. Unsplash is a website where photographers can share high resolution images, making them publicly available for everyone for free, even for commercial use. Created in May 2013 by a trio of Canadian entrepreneurs. Four months after creation they hit one million downloads, and a year after that they had more than a million downloads per month. Now there are 400,000+ high resolution images hosted on Unsplash, shared by 65,000+ photographers from all around the world.

The image I used was I thought vaguely commercial, in that it had a young man on a mountain bike in outstanding scenery. So how has it done over the past week? Well, I don’t know if this is good or not, but it has had  1534 views and 11 downloads. My work is out there flying free.

Why Use Unsplash?

Imagine designers, artists, writers from around the world can now use my image for album covers, posters, article headers, blog posts, and advertising etc etc. However, this is a disruptive technology which will threaten traditional curators like Shutterstock, and eventually undermine the work of professional photographers. So should we allow our photographs to be given away?

Stock photography is dying, people are paying less and less for images, and let’s face it there is a lot of theft out there. The value of my images sitting on my hard drive is virtually nil.  So why should I not give myself the pleasure of giving them away? People in poorer parts of the world, students, new businesses, charities can all benefit.

My photographs will be out there doing good.

What makes you happy is worth all the money in the world, and it makes me happy to give my images for free to those who need them.  Samual Zeller


Filed Under: Journey, Photography, Post Processing Tagged With: Post Processing

Canon EOS 6D Mark II Review of Reviews

by John Gough

Canon EOS 6D Mark II


When the Canon EOS 6D was launched, it was a massively popular camera, full frame detail, and brilliance at a price the enthusiast could afford. In August 2017 after a five year wait, it’s successor the Canon EOS 6D Mark II was launched, and frankly, it was a disappointment. Does this camera deserve the slating it has had? Is this camera as poor as critics have made out? Let’s look at the reviews to try to understand what went wrong, and try to understand whether the doom merchants were proved right.

In July last year, the wait was over the 6DII which had been heavily trailed on Canon rumour sites and forums was finally released.

Canon EOS 6D Mark II: Digital Trends Review

Digital Trends was one of the first to review the camera based on a Canon sponsored trip to the Grand Canyon to test beta models prior to release. They were impressed by the new spec’ compared with the old Canon EOS 6D.

  • Digic 7 processor vs Digic 5 in the 6D.
  • An all new 26.2 megapixel full-frame sensor vs a 20 megapixel full frame sensor
  • ISO increased from 25,600 to 40,000
  • Burst rate from 4.5 frames per second (fps) to 6.5.
  • GPS is built in for automatic geotagging without requiring a mobile app as in the 6D
  • The 6D 11 point AF system with one cross-type sensor, is replaced by a 45 point all cross type AF sensor
  • New Dual Pixel autofocus (DPAF) technology
  • New articulating three-inch touchscreen with a 1.4-million dot resolution.

However, they were disappointed that there was no 4K video. Furthermore, despite Canon’s hospitality, there were already the first hints of the disenchantment to come:

After waiting some four-and-half years, it would have been nice to see the 6D take a bigger leap forward, rather than just play catch up to the rest of the product line.

Canon EOS 6D Mark II: Pocket-Lint Review

Pocket-lint were one of the next reviewers on the block. They praised the versatility of the camera, especially with the articulating screen and pointed out how light the camera was compared to the 5D IV, and Nikon.

They were impressed:

  • The 6D 75g is lighter than the Nikon D750.
  • The Dual Pixel AF technology = fast focusing
  • The 7560 RGB+IR metering sensor performed well
  • There was now Bluetooth

However, it was mixed with reservations:

  • The viewfinder only covers 98% field of view, meaning you are likely to be cropping the edges. With the 5D IV it is a 100% field of view.
  • There are 45 autofocus points all cross type, more than the 11 with just one cross type in the 6D, but less than the 61 in the 5D IV.
  • The burst rate of 6.5fps is half a frame slower than the 5D IV.
  • There is only one card slot compared to two on the 5D IV. An annoying restriction for wedding and professional photographers.

At launch, there was around one thousand pounds difference in price between the Canon EOS 6D II, and the Canon EOS 5D IV. However, the reviewers questioned whether for all customers the additional £1000 was worth the few additional features.

For many it will fulfill every need at a far lower price than buying a 5D Mark IV, which gives this full-framer considerable appeal.

Canon EOS Mark II: Ken Rockwell

I respect Ken Rockwell. His reviews are detailed, and he seems to be dead straight, there are none of the current biases e.g. mirrorless vs DSLR, Canon vs Nikon vs Sony, Fujifilm vs the world. I bought the Canon 6D based on his recommendation, so what are his views and comments about the 6DII.

  • The image quality is the same, but it may take more time and trouble to change settings than with more expensive cameras.
  • The 6DII is light compared with Sony’s top full-frame mirrorless cameras which aren’t much lighter.
  • High quality domestic Japanese production, not offshored to China or Thailand like Sony or Nikon.
  • There is no facial recognition, which now comes as standard with most mirrorless cameras
  • There is at least some weather sealing
  • “The rubbery grip material is the best in the industry. It’s super grippy, yet firm. It’s as if it’s made of the same nanomaterial as the footpads of a lizard that grip anything without being sticky”
  • Ken Rockwell has shot the same scene at various ISOs and his conclusion is that the high ISO performance is state of the art and matches other current full-frame cameras like the Sony A7R Mk III.

The review is summed up by some encouraging words.

The original Canon 6D has always been the world’s best low-cost full-frame DSLR, and this new 6D Mark II is even better.

The 6D Mk II is excellent for most DSLR uses like landscapes, however for people pictures I prefer a camera with facial recognition for regular viewfinder shooting, like a mirrorless camera or a higher-end Canon DSLR.

Canon EOS Mark II: Dpreview

Dpreview is another respected source. Here are some of their views and comments that we have not picked up in previous reviews:

  • There is face detect in Live View using the articulated screen rather than the viewfinder.
  •  Not having a flash is not a big disadvantage because the high ISO performance is so good.
  • Canon’s metering system tends to underexpose backlit shots.
  • Subject tracking AF is not up with the best, meaning that there could be some out of focus shots in the middle of a burst
  • The 45 point AF is centred, which can be a disadvantage if you want to compose off centre.

However, the review picks up on the main flaw in the 6DII, which is that the new 26 megapixel sensor is not sensitive at low ISOs especially in terms of dynamic range, which means that recovering detail from dark shadow in RAW is compromised. Images appear noisy which means that the flexibility you might expect in post processing is not there.  Tests by Dpreview show that it is the new sensor that is adding the noise. They conclude that:

the benefits that appeared in the sensors used in the EOS 80D and EOS 5D IV have not been applied to the latest EOS 6D

Sensor performance they claim falls well behind competitors and is no better than the original 6D. So in conclusion:

Let’s be clear: The EOS 6D Mark II is, like so many other cameras, capable of outstanding images in the right hands. But even considering all the traditional Canon bonuses like great color, ease of use for video capture and comprehensive lens ecosystem, the 6D II falls too far short for us to recommend it over the competition, and therefore it doesn’t merit our highest awards.

Canon EOS Mark II: DXOMARK

For definitive laboratory type sensor testing go to DXOMARK.

Picture quality is based on two factors, sensor quality and the quality of the lens you can afford. Here we are looking at one half of the equation. DXOMARK give an overall mark based on their tests of sensor performance. The Canon 6DII gets a score of 85. By comparison, other Canon full frame cameras get a higher score due to their more advanced sensors.  The Canon EOS 1D x Mark II launched in 2016 scores 88, and the Canon EOS 5D MarkIV scores 91. Canon has the technology, but chose not to use it on the 6DII.

In 2012 when the 6D was launched the major competition came from Nikon, but times have changed. Now even the Sony a6300 which is not even full frame, but an APS-C format sensor, scores 85. The full frame Sony A7R launched in 2013 and now priced well below the 6DII scores a whopping 95, and it’s successor the Sony A7R III scores an even more whopping 100. Imagine that with the latest Sony G glass. Read about it.

However, lets leave the last word on the sensor to DXOMARK:

[The score] is a result of notably lower dynamic range recorded by the 6D Mark II at base ISO, which is a concern for photographers after the best image quality in good light. From ISO 800, dynamic range is much closer to the performance of semi pro rivals such as the Nikon D750 and Sony A7 II however, and with good color sensitivity at all settings and well-controlled noise the 6D Mark II lends itself better to low light photography.

Canon EOS 6D Mark II: Conclusion

The 6DII was never going to be a sports or a wildlife camera, the burst rate is too slow and the AF too clunky to follow the action. As a people shooting camera, the lack of face recognition and the centre positioned auto focus make it difficult to use creatively. However, the camera is on paper ideal for landscape and nature, the higher resolution full frame sensor, the weather sealing, and the flippy screen make working on a tripod a breeze. However, lift the hood and the engine has not got the grunt in terms of dynamic range that serious RAW landscape and nature photographers might expect.

Canon EOS 6D Mark II: The Good News and the Bad News

However, in reviewing the 6DII there is good news and bad news. Let’s get the bad news out of the way first. Canon have been too cautious with the 6DII. Keeping it purposely not quite as good as the 5DIV to maintain parity across the product line. The 6DII has taken 5 years to develop and was designed by a committee. During which time it was overtaken by the likes of Sony, and their old rival Nikon, with the matchless Nikon D850.   

Now for the good news. The bad press has actually turned the situation around, and as a result the price of the 6DII is falling. At launch, the purchase price in the UK was £1999. The current price at the time of writing (Jan 2018) is £1728, compared with the Canon 5DIV, which is now almost twice the price at £3229.

If you shop around you can get the 6DII for an amazing £1185.  Ok, the 6DII is a flawed camera, but at that price, it is a great camera.

Where to Buy

I buy all my equipment at Wex because they have great customer service


Filed Under: Cameras, Canon Cameras, Gear, Journey Tagged With: Canon Cameras

How to Win a Photography Competition: 50 Tips

by John Gough

Photography Competition

Christmas at St Pancras / John Gough / Canon EOS 6D

How to Win a Photography Competition

Looking to win a photography competition in the New Year? Whether it be at club level, or international level the devil is in the detail. The judge is looking for the best, but also has to exclude the rest. If the judge can find good reason to remove the majority of the entrants, then selecting the best from whats left, makes choosing a winner so much easier.

If the reasons why the judge might exclude your entry are eliminated, then your image can reach the shortlist. From there, it is down to which photograph the judge will put first, and that is a subjective judgement, that no one can predict.

Impact

To make an image competition ready, is a lot of hard work. There is no point polishing sh*t.

Pick an image that is outstanding.

  1. First impressions count. There has to be impact. There has to be a Wow!.
  2. Make sure the picture tells a story, otherwise it is just a record shot.
  3. There has to be photographer input, otherwise it is just a snap.
  4. Find an emotive connection: sadness, happiness, humour, joy, fear, surprise. Ask how does the image move me?
  5. If the image is perfect, but there is no emotional content, the judge will look for extraneous reasons to reject e.g. “Could have done with a figure in the foreground” or  “Do we need those figures in the foreground?”.
  6. Pictures of family members that you love, are not usually winners. There is an emotive connection with yourself, but not with the judge.
  7. Try to avoid cliche shots. Do we need another waterfall with a 10 stop nd filter?
  8. Don’t try anything too clever, like multiple layering for no creative reason. It is just an excuse the judge will use to mark low.

Composition

The judge will always go for a safe selection. A well composed picture that is technically perfect. The judge will therefore be looking for obvious mistakes. Composition rules are of course meant to be broken. In this instance however, it is just another excuse the judge can use to give the image a low score.

Look for any composition blunders that should be eradicated, otherwise your image will be eliminated.

  1. Judges love the rule of thirds. Don’t put the horizon in the middle of the image, otherwise the judge will pounce.
  2. Judges love three things not two, not four. Three.
  3. Don’t crop too tight, give room for the subject to move into and out of the picture. Judges love commenting on cropping.
  4. Watch diagonal lines that lead into the corner of the picture. Some judges don’t like it.
  5. Create a strong focal point
  6. Give the eye a route to follow. Leading lines for example. Don’t let the judges eye wander out of the frame and get lost.

Image Quality

IQ is more important than the subject in a photography competition. The judge is likely to be ambiguous about the subject, but image quality can provide endless negative feedback. It is possible to fix a lot of IQ in post production, so very carefully critique your entry.

This is a long but vital check list.

  1. First get rid of spots by cloning them out. There are tools in Photoshop and Lightroom. It can be embarrassing, and fatal if the judge finds a dust spot.
  2. If the image is not pin sharp in at least one important part of the subject, then reject it totally. No amount of post sharpening can recover what is not in focus.
  3. Do not try to use creative blur, even motion blur. Unless you get it 100% right, e.g. when panning a race car, it just gives the judge another handle to grab.
  4. Blown highlights will lead to instant dismissal.
  5. Pull out the detail in shadows.
  6. Any dark or light areas will pull the judge’s eye away from the subject.
  7. Straighten that horizon, it is too obvious a mistake to make.
  8. Correct any converging verticals
  9. Check the white balance. Remember in RAW there is no auto balance
  10. Add contrast, a flat image looks like a pancake.
  11. Use the clarity slider sparingly. It is often hard to see, but it can make your images seem over edited. The judge will see it if you do not.
  12. Sharpening in post production is one of the most difficult skills to master. Use only a little. Note that Lightroom sharpens an image by 25% during import. Less is more.
  13. Judges will be on the look out for any halo effect which can be caused by a number of factors, including too much clarity and over sharpening.
  14. Pay attention to saturation and vibrance. Was the grass really that green?
  15. Examine the image for colour casts.
  16. Don’t allow one colour to be too dominant.
  17. You may have a good artistic reason for converting to mono. The judge however will look for any defects that are being hidden.
  18. Judges will often remark in club competitions that, “I would have cloned that out”.  Get the message.
  19. Clone out all extraneous detail which is not part of the image. If I was painting this picture would I add that detail?
  20. Examine the background. Clone out anything that will take the eye off the subject.
  21. Dodge and burn to darken the background and illuminate the subject.
  22. Get rid of any distracting elements, lamp posts etc.
  23. Crop out any unnecessary foreground.
  24. If there is no interest in the sky, crop it out or replace it.
  25. Examine the edges and clone or crop out any extraneous artefacts.
  26. Consider adding a touch of a vignette to draw the judge’s eye into the composition.
  27. A vignette will also  darken the edges, and tone down any unnecessary detail.
  28. Be careful not to give away your post processing, e.g a clumsy clone stamp.
  29. If you must have a key line, go for mid grey one pixel wide.

Finishing Touches

Make sure that your image meets the photography competition criteria.

  1. Is there a size limit e.g. 1600px x 1200px? Is there a file size limit?
  2. Is a border required?
  3. Is there a limit on the number of entries?
  4. Does your image fit the competition category you are entering.
  5. Is there a format for the title?
  6. Use the title to communicate with the judge. What do you want them to see? The title may be the only handle the judge has on the image.
  7. Find out who the judges are. Research their background and the type of photography they enjoy. If you give them what they like, you may just be in with a chance.

That is 50 top tips, not for winning a photography competition. These are 50 top tips to keep your picture in the judging process, long enough to be considered a winner.

N.B. The image featured was entered into a competition run by the Royal Photographic Society and used on their corporate Christmas Card in 2016.

Filed Under: Competitions, Journey, Photography Tagged With: Photography competitions

Sony 18-105 f4 G OSS Lens Review of Reviews

by John Gough

Sony 18-105

Sony 18-105 f4 G OSS

This is an analysis of the reviews for the Sony a6300 e-mount lens, the Sony 18-105 f4 G OSS.

There are not a huge array of lenses to fit the Sony e-mount. It is therefore worth investigating the Sony 18-105, which has a useful focal range for general, travel and landscape photography, and costs less than £500.

A Summary of the Reviews

  • Not that fast but OSS makes up for 2 to 3 stops
  • Reasonably sharp and almost outstanding.
  • Some image quality flaws but nothing that cannot be ironed out in camera for JPEG and in post with RAW
  • Too big for mirrorless ethos but nicely balanced on camera
  • Not a Zeiss lens but has the look and feel of one.
  • After all it is a Sony G lens at a reasonable price.

Sony 18-105 f4 G OSS Lens Reviews

Ken Rockwell

Always speaks sense. I have a lot of time for his reviews. This is his review of the lens.

These are my notes:

  • Not as really sharp as most DSLR or Zeiss mirrorless lenses today, but the lens is more than adequate
  • The zoom ring connects to the camera’s computer system. The disadvantage of this is that you can’t just twist the ring to go immediately from one end to the other; you always have to wait for it to motor in or out.
  • Bokeh is good at the long end where it matters
  • There is minor to strong barrel distortion, but this can be easily corrected in Lightroom or Photoshop
  • Zooming is controlled by a motor which is much slower than a real mechanical zoom ring for shooting stills, but is much smoother for shooting video
  • Size defeats the point of a mirrorless camera. If you don’t mind carrying it, does everything in just one lens at a reasonable price.

The Phoblographer

Plain speaking, with good selection of sample shots. This is the review of the lens

These are my notes:

  • ‘The image quality is really where you’ll become smitten with it’
  • The lens is internal zooming
  • The exterior is smooth and Zeiss like, but there is no weather sealing
  • ‘for element image quality, the Sony 18-105mm f4 G OSS has to be the single best lens that we’ve seen for the system’s APS-C cameras’
  • Sharpness is best at above f6.3
  • Big for a mirrorless camera
  • Editors Choice

EPhotozine

Lots of detail with a few charts. This is the review of the lens.

These are my notes:

  • ‘Despite the large size of this lens, it is reasonably light weight, weighing only 427g’,
  • Manual focus is smooth and nicely damped
  • ‘For those times when slow shutter speeds are necessary, this lens comes equipped with optical image stabilisation. With care, sharp hand-held images can be taken at shutter speeds as slow as 1/20sec, which is roughly three stops slower than the usual rule of thumb for hand-held photography would allow’.
  • Sharpness at the centre of the frame is ‘outstanding’ through the range. Poor performance at the edge of the frame especially at 105mm

DXOMark

Sony E PZ 18-105mm F4 G OSS lens review: Attractive option

The go to site for lens performance.  The Sony 18-105 scores 15. This is ahead of all the other zoom lenses available for Sony e mount in 2015. With the exception of the Sony Vario-Tessar T* E 16-70mm F4 ZA OSS which is a Zeiss lens and scored 17.

Admiring Light

The editor Jordan Steele now shoots entirely mirrorless with Sony, Fuji and Olympus kit

http://admiringlight.com/blog/review-sony-e-pz-18-105mm-f4-g-oss/

These are my notes:

  • ‘The one down side to the power zoom implementation is that it sets itself to a ‘park’ position (somewhere in the middle of the zoom range) when you turn off the camera, and then resets itself to 18mm when the camera is turned on.  It would be nice if the camera could remember the last zoom position and reset to that position when powering on’.
  • The front element of the lens is hard to clean, and although UV filters are going out of vogue, fit one.

Where to Buy Your Equipment

I buy my equipment from Wex because of their exceptional customer service. I once returned a camera after 30 days, and the next day they called to return my money to my account. Their prices are always competitive and they offer good prices on the trade in of your used gear.


Filed Under: Equipment, Gear, Journey, Sony Tagged With: Sony Cameras

Important Get a Camera Wrist Strap

by John Gough

Camera Wrist Strap

Suspension Bridge / John Gough / Sony a6300

Yesterday I was shooting both urban and landscape using the Sony a6300. Shooting on the busy street I was holding my camera. I was jostled and the camera fell out of my hand.

Later I was on this bridge. I slipped on the ice and dropped the camera. It was in the river.

Camera Wrist Strap

Or would have been, if the camera had not been tethered to my wrist with a strong wrist strap. Two incidents in one day, which without the camera wrist strap, could have ended up as a very expensive day out.

Mirrorless cameras are small and light so a neck strap seems unnecessary. Plus if you are into street photography a big neck strap with the manufacturer’s logo, is just too conspicuous.

The wrist strap I use is this Mayveek paracord lanyard, but there are lots of different types on Amazon. This wrist strap, however grips your wrist securely and incorporates a sturdy quick release clip

To attach the wrist strap to the camera, I use these Op Tech System Connectors, which on my DSLR enables me to quickly switch between a camera wrist strap or neck strap.

A camera wrist strap  is probably the cheapest accessory you will ever buy, but it could end up saving you thousands.

Filed Under: Equipment, Gear, Journey

Sony a6300 Setup

by John Gough

a6300 setup

The Meeting / John Gough / Sony a6300

I recently purchased a Sony a6300 because it seems ideal for street photography. I have been setting it up and changing settings for a few weeks, but it is now good to go. The picture above was one of the first using the a6300 setup as described. From what I can see the a6300 settings are similar settings to the Sony a6500.

These notes are also going to be used as my checklist. So often I change a setting for a different circumstance, but do not remember to revert back to my original setup.

The Sony a6300 and Sony a6500 Setup

Cameras are now so configurable that it is worth sitting down for an afternoon to turn your camera into the one you want. Then go out and take a few shots, and change again until it is right. Lets start at the top.

Sony a6300 Aperture

Aperture Priority

The big dial on the top plate of the camera is the mode dial, where Program, Aperture Priority, Shutter Priority, Manual or one of the Auto or Scene modes can be set. Many street photographers recommend Program mode, which is essentially an automatic setting for RAW files. However in Program mode, the Sony algorithm seems to move the shutter speed lower without moving the ISO higher, so I shoot Aperture Priority. It gives control over the aperture using the dial on the right hand side of the camera. This is a function dial, which when in Aperture Priority mode changes the aperture. Now to fix the ISO, and the camera will do the rest.

Sony a6300

Sony a6300 top

ISO

Whether you are on the New York streets or taking a picture of your family in the park, you want sharp pictures. As the light fails, move the aperture down to the widest for the lens you have attached. On the kit lens supplied with the Sony a6300 that is f3.5. It is surprising especially in a UK winter, how quickly that buffer is reached. It is also tempting to let the shutter speed get lower, when after all, the lens has image stabilisation. But more of my picture are blurred through a low shutter speed and consequently camera shake than any other reason. So a high ISO is required to give some flexibility.

Reading the reviews, high ISO’s are possible with this camera without compromising image quality. It is personal, high ISO’s lead to more noise. How much is acceptable is up to you. Try it out. Is a high ISO better than a shaky shot. Again it is personal preference.

I usually shoot at ISO640

The quick route to changing ISO is to use the Fn or Function button on the rear of the camera, which brings up some often used controls

Fn>ISO or Menu>Camera>4>ISO or Control Wheel>right.

Sony a6300 Back

Sony a6300 Back

Sony a6300 Drive

Drive Mode

I usually leave the drive mode as single shot. The continuous shooting is so fast that before you know it you have hundreds of images to post process.

Fn>Drive>Single Shot or Menu>Camera>2>Drive Mode>Single Shot or Control Wheel>left>Single Shot

Set the C1 Custom Button to Drive Mode

There are circumstances where the continuous mode is useful. I therefore set the Custom 1 button on the top of the camera, to bring up the drive mode menu.

Menu>Wheel>7>Custom Key(Shoot)>Custom Button 1>Drive Mode 

Silent Shutter

This is a completely silent shutter, definitely useful in situations where you don’t want to cause a stir.

Menu>Wheel>5>Silent Shooting On

Personally I prefer to risk the shutter sound. I can be sure then that I have the picture.

Sony A6300 Metering

Metering Mode

Metering technology is pretty much taken for granted, but when you realise how much time used to be spent with light meters, it is really special. Choose a metering mode. The multi mode seems to work the majority of the time

Fn>Metering Mode or Menu>Camera>5>Metering Mode

White Balance

White balance is used to get colours as true as possible. Auto seems to work well. In the rare circumstance that the camera does not handle it correctly, it can be fixed in post processing.

Fn>AWB or Menu>Camera>5>White Balance>Auto

Sony A6300 Focus

Focus Area

There are various options:

Wide

Focuses automatically on a subject in all ranges of the image. When you press the shutter button halfway down in still image shooting mode, a green frame is displayed around the area that is in focus.

Zone

Select a zone on the monitor on which to focus. A zone consists of nine focus areas, and the camera selects a focus area on which to focus.

Centre

Focuses automatically on a subject in the middle of the image. If you half press the shutter or use AF lock it is possible to hold the focus and recompose the shot.

Flexible Spot

This allows you to move the focus frame to where it is required on the shot.

Expand Flexible Spot

If the camera cannot find focus within the focus frame it will focus on points around the flexible spot as a secondary priority area for focusing.

It is worth understanding how mirrorless cameras differ from DSLRs in terms of focusing, and how the Sony a6000’s hybrid focus detection works.

My choice is the flexible spot focus area. It is also possible to select how big the focus area should be. Small, Medium or Large. I recommend running some test shots and see which is best for you. Following my testing I chose the large focus area. It seemed to me that the camera was struggling to find focus when set to Small

Fn>Focus Area>Flexible Spot>Large or Menu>Camera>3>Focus Area>Flexible Spot>Large

Focus Mode: AF-S

Focus Mode (not to be confused with Focus Area) changes how the focus adapts to different scenarios. In AF-C, which is ideal for continuous shooting the camera will reattempt to focus every time a subject moves. AF-S locks the focus despite the subject’s movement. Ideal for single shot shooting.

Fn>AF-s or Menu>Camera>3>Focus Mode>Single Shot AF

AF Illuminator

This is a beam of light which assists the camera focus in low light. However this camera copes admirably in difficult lighting, therefore is is best to switch off and avoid being given away by a red beam of light. Especially useful when covertly shooting on the street.

Menu>Camera>3>AF Illuminator>Off

Pre AF

When Pre-AF is on the camera will continuously focus, even without half-pressing the shutter button. This can be draining to the battery, so I set to off.

Menu>Wheel>3>Pre AF>Off

Priority Set in AF-S

This setting allows the release of the shutter even when the subject is not in focus, when Focus Mode is set to Single-shot AF. There is a setting, AF which prioritises focusing. The shutter will not be released until the subject is in focus. I only want to take pictures that are focused correctly, so that is the setting I use.

Menu>Wheel>5>Priority Set in AF-S>AF

AF with Shutter

Selects whether to focus automatically when you press the shutter button halfway down. Leave this switched on to focus.

Menu>Wheel>5>AF w/shutter>On

AEL with Shutter

Determines whether the exposure and focus are both set when the shutter is pressed half way down. Leave on Auto

Menu>Wheel>5>AEL w/shutter>Auto

Centre Lock-On AF

This feature will track the subject at the centre of the image and is useful in e.g. sports photography. For single shot I switch off.

Menu>Camera>6>Centre Lock-On AF>Off

Smile / Face Detect

This is a clever feature on the Sony a6300, because there is a setting to register faces. This for example could be used at a wedding, to register the bride and grooms’ face. These will then be held in memory and automatically brought into focus in a any scene. Up to eight people can be registered. However I just want to switch on face detect, which is both useful in general photography and street photography.

Menu>Camera>6>Smile / Face Detect>On

Eye Detect

Eye detect is another powerful feature on the Sony a6300. I have it setup so that the AEL button activates eye detect. NB the AEL button must be held down to maintain focus on the eyes.

Menu>Wheel>7>Custom Key Shoot>2>AEL Button>EyeAF

Summary AF

This guide from Sony provides a comprehensive review of the AF function on the Sony a6000, which also applies to the Sony a6300 and 6500.

Sony a6300 Screen and Viewfinder Settings

EVF / Screen

I have this set to auto, so that when you put your eye to the viewfinder, the screen switches off. The problem is that the detector on the view finder is very sensitive, so that when you hold the camera at waist level to use the flip out screen, the screen switches off. There is a custom setting to toggle between finder and screen, but in my experience it does not work consistently. Therefore I use this setting.

Menu>Wheel>4>FINDER / MONITOR>Auto

The solution I have come up to desensitise the finder detector, involves glue and sticking plaster, using a product called Light Dims. These are little inexpensive, stick-on pieces of a neutral grey shading material  which are actually made for putting over LED’s that are too bright.

Simply cut a 3mm x 5mm piece of this material and apply it over the left half of the EVF sensor. The sensor continues to function perfectly, and the LCD remains on even in very low light. The EVF then still switches on again automatically, when the camera is held up to your eye.

Sony a6300 Other Settings

 RAW

I will be shooting RAW. This is set:

Menu>Camera>1>Quality / RAW

Grid Line

Useful tool for composition:

Menu>Wheel>1>Grid Line>Rule of 3rds Grid

MR Setting

To save these settings to 1 on the mode dial on the top plate of the camera

Menu>Camera>9>Memory> 1

Summary Setting Up the Sony a6300

The Sony a6300 is an amazingly versatile camera. The settings may be bewildering, if that is the case then set the camera to Auto and get great results. But to get even better results dive in and understand the settings and make the camera your own.

Right now the Sony a6000 is the best camera without doubt for under £500. The a6700 will likely be launched early 2018, so get in while you can, and please use my link as I receive a small affiliate payment. Many Thanks


Where to Buy Your Equipment

I buy my equipment from Wex because of their exceptional customer service. I once returned a camera after 30 days, and the next day they called to return my money to my account. Their prices are always competitive and they offer good prices on the trade in of your used gear


Filed Under: Journey, Sony, Sony a6300 Tagged With: Sony Cameras

Street Photography Update

by John Gough

Street Photography

Jerk Pork / John Gough / Canon EOS 6D


What is happening in the world of street photography?

I found a film on Amazon Prime called Everybody Street, which has street photographers from New York, including Bruce Davidson, Mary Ellen Mark, Elliott Erwitt, Ricky Powell and Joel Mayerowitz, talking about how and why they take pictures.

Everybody Street

I have since sourced the film on YouTube:

As I watched the film I jotted down some insights from these iconic photographers:

Why do some photographers go to the street and others go to the studio?

Learning to read your culture is a great fascination for photographers

Capture what might be of interest in the future. When its gone, you realise that you missed taking a picture of it

There are too many bad photographs, but the good ones illuminate and entertain and get some sort of emotion, laugh or cry or something in between

Invisibility, a little camera makes you look like a sneak

Definition of public and private is smashed, so objecting to having a camera in your face is obsolete

You make the picture in the moment, turn left you have a picture, turn right and you don’t get one

Rendering the human condition, sharing the world as it is, recording life my way

More and more I want to take pictures, because I have less and less time left

Photography is about description, that is what a camera does. However as human beings we learn to understand minute little exchanges. It is down to us believing that this slice of a moment will present its self. There are a lot of people that don’t believe that the world is going to present itself in that way, so they don’t see it because they don’t look for it.

If you have a spare hour and a half and you love street photography you will love this film.


I recently saw Damien Demolder talk about street photography

Damien Demolder

Damien is an interesting speaker. He was editor of Amateur Photographer for around fifteen years. He is now a journalist, photographer, reviewer of kit and a judge on some big photography competitions. I recently saw him speak about his photography. Street photography he defines as people and architecture. His work is here

This was just some of the learning I took away.

Photography and especially street photography is showing ordinary things in an extraordinary way.

Light is important. Our subject is light. Wait for light.

Photographers are more observant than other people. Look for that decisive moment.

Shoot with a standard lens. Need to be involved with the subject not standing far away

Holding a viewfinder to your head cuts you off from the world. 98% of pictures are taken from head height. If you have a flip up the screen then shoot from the hip. It is a different view and you can see the picture coming next.

Hold your camera in front of you. Use the screen. You look like an idiot but not like a photographer.

Here is Damien talking about street portraiture:


Filed Under: Journey, Photographer, Photography, Street Photography Tagged With: street photography

Silver Efex Moody Monochrome

by John Gough


silver efex

Coffee at The Mitre / John Gough / Sony a6300

I was out and about in Cambridge yesterday with my camera, and I was accosted by an elderly lady. She thought that because I was carrying a camera, I must be a snoop from the council. That is just one of the hazards of street photography. Had I been carrying a big DSLR, she would have assumed I was a proper photographer. However, a small camera like the Sony a6300 can unfortunately make you seem like a furtive fellow.

The picture above was taken there. The couple look delighted to have been caught on camera. I was having a good day!

The Google Nik Collection including Silver Efex Pro2

I created the moody monochrome image using Silver Efex Pro2, from the Google Nik Collection.

The Google Nik Collection is the best free resource for photographers available on the web. In 2016 when Google decided not to support the software further, it went on to provide the software free to photographers. This was both good and bad news. The software was free, but it was never going to to be updated. However, a month or so ago it was agreed that DxO acquire the Nik Collection, and fortunately they plan to continue to develop it. A revised version will be available mid 2018.

It is still possible to download the existing software, including Silver Efex for monochrome post processing here.

Silver Efex Pro2

This is a note to myself about how the image was processed.

Lightroom

In Lightroom, there are the usual workflow: exposure, sharpness and white balance adjustments to process from RAW. The image was then desaturated to -31, the vibrance taken down to -29 and the clarity pushed up to +71. Reducing the colour to provide a dark and moody presence.  I also added a shallow tone curve and imperceptible vignette.

Photoshop

Removed the reflection of myself and used the burn tool to tone down the interior of the pub, reducing lights and reflections.

Silver Efex

Processed to mono using preset 23 Wet Rocks and film type Agfa APX Pro 100.

Conclusion

To achieve that look, without Silver Efex would be impossible for an amateur retoucher like myself. Furthermore, in the distant analogue days it would have taken hours of work in the darkroom to achieve the same results.


Learn more:


Filed Under: Journey, Lightroom, Nik Collection, Photography, Photoshop, Post Processing, Silver Efex, Sony a6300, Street Photography Tagged With: Post Processing

How to Make Your Photos Pop

by John Gough

I recently entered an event at Bedford Camera Club, where we were presented with six photographs in RAW. Our objective was to process three images and present back how we did it. These are my notes, about how I went about trying to make these photos pop in Lightroom and Photoshop. I have not explained the technical details, but I have included some links to all the technical information..

Amazon have a good deal on Lightroom and Photoshop at the moment:


Image 1. How to make Your Photos Pop

This is the first image in RAW. Looks very drab and ordinary, BEFORE processing.

How to make your Photos pop

Image 1 BEFORE

The Issues with this Image

The picture is grey and washed out. There is no detail in the sky. There is no real focus on what the subject is. There is too much foreground. The edges are messy. The detail in the pebbles and brickwork are lost.

Processing in Lightroom and Photoshop

  1. Import the RAW file to Lightroom CC.
  2. Crop to A4 (Custom size 2.1 x 2.97) tightening the view to concentrate on the fishing boats. Excluding the motor boat on the right.
  3. Straighten the horizon. The roof in the background is not flat
  4. Check exposure. This image looks around a third of a stop under exposed
  5. Add contrast to make the image less flat
  6. Launch a Develop Lightroom preset. Here we are using my user preset for landscape
    1. Highlights -100 Shadows +100
    2. Adjust the whites and blacks by holding down the alt key (Windows)
    3. Move the Clarity / Vibrance / Saturation sliders to suit the effect required.
    4. Tone Curve.  Again to suit effect. Try an S curve
    5. Sharpening and Luminance around 30-45
    6. Tick Lens Correction and Enable Profile Correction
  7. Check the white balance. Take the dropper and pick a neutral grey colour. This will set the white balance.
  8. Move the image to Photoshop. Photo>Edit in>Edit in Photoshop CC
  9. Clone out the distracting speed boat on the right.
  10. Use the Dodge Tool to lighten the foreground and under the boats
  11. Use the Burn Tool just to add some detail back into the buildings and the decks of the boat
  12. To replace the sky. Erase the existing sky. Select>Colour Range>Fuzziness c’139. NB this method avoids having to somehow cut around the masts and rigging
  13. Use Erase tool to take out any remaining sky.
  14. Select an image with sky and add as a layer. Blend with the existing layer
  15. In Photoshop save. Image then available in Lightroom
  16. In Lightroom recheck the white balance / exposure /contrast etc for the new merged image
  17. Add a Post Crop Vignette that is there but not visible e.g. -14
  18. Save the image as a JPG
How to make your photos pop

Image 1 AFTER


Image 2 How to make Your Photos Pop

This is the second image in RAW. At least there is some interest in this image, but despite the magnificent architecture, it is drab and unexciting.

how to make a photo pop

Image 2 BEFORE


The Issues with this Image

This image has an odd sepia cast, as if the white balance needs correction. The detail in the sky is probably not worth trying to recover and could be replaced. The picture is dark and lacks detail. There is no real focus on the subject, the photograph is not about the two pigeons in the foreground.

Processing in Lightroom and Photoshop

  1. Import the RAW file into Lightroom CC
  2. Crop to A4 and lose the foreground
  3. Check exposure. This image looks around a third of a stop under exposed
  4. Add contrast to
  5. Launch a Lightroom preset (see above)
    1. Clarity / Vibrance / Saturation important to get some colour from the bland landscape.
    2. Manipulate the tone curve to get some detail
  6. The tower looks as though it is leaning backwards
    1. Go to the Transform tool
    2.  Use the vertical slider to -20 to correct
  7. Move the image to Photoshop. Photo>Edit in>Edit in Photoshop CC
  8. Use dodge and burn tools to create different light in the piazza, and to the buildings left and right
  9. Erase the sky. Select>Colour Range>Fuzziness (see above). This will preserve the building tracery on the buildings to the left and the spires and crosses
  10. Select an image with sky and add as a layer. Blend with the existing layer
  11. In Photoshop save. The image is then available in Lightroom
  12. In Lightroom recheck the white balance / exposure /contrast etc for the new merged image
  13. Add a Post Crop Vignette that is there but not visible
  14. The image still has an orange cast so recheck the white balance. The foreground piazza looks as though it should be grey so use the dropper to sample colour there.
  15. Save the image as a JPG
photos pop

Image 2 AFTER

Image 3 How to Make Your Photos Pop

This is the third image in RAW. There is a picture in there somewhere trying to get out.

photos pop

Image 3 BEFORE

The Issues with this Image

The detail in the columns is lost. There is no real colour so would it be better in black and white? The portrait mode makes the picture mostly pavement. The two nuns should be made the focus of the image.

Processing in Lightroom, Photoshop and Nik Silver Efex Pro2

  1. Import the RAW file into Lightroom CC
  2. Crop to A4 and change from portrait to landscape. That way we focus on the ladies walking and lose the black shadow overhead. Place ladies in the centre of the rule of thirds grid
  3. Check white balance/exposure/contrast
  4. Apply a Lightroom preset (see above)
  5. Move the image to Photoshop. Photo>Edit in>Edit in Photoshop CC
  6. Use dodge tool to reveal the detail in the columns and paving.
  7. In Photoshop save. The image is then available in Lightroom
  8. Move the image to Nik Silver Efex Pro2 which you can download for free here. Photo>Edit in>Edit in Siver Efex Pro2
  9. Select a preset from the preset library in Silver Efex.
  10. Save to move image back to Lightroom
  11. Add a Post Crop Vignette that is there but not visible
  12. Save the image as a JPEG


I am fascinated by digital post production. However, I am still very much in the foothills in the journey to master Photoshop especially. If you want to see just what can be achieved, look at the books and videos of Glyn Dewis.


Filed Under: Journey, Lightroom, Nik Collection, Photography, Photoshop, Post Processing, Silver Efex Tagged With: Post Processing

« Previous Page
Next Page »
Copyright: John Gough 2025