• Home
  • Images of the Month
  • My Notes
  • About
  • Contact
    • Privacy Policy

iJourneys

John Gough Photography

Autumn Multiple Exposures

by John Gough

multiple exposures
Autumn Abstract/ John Gough / Canon EOS R

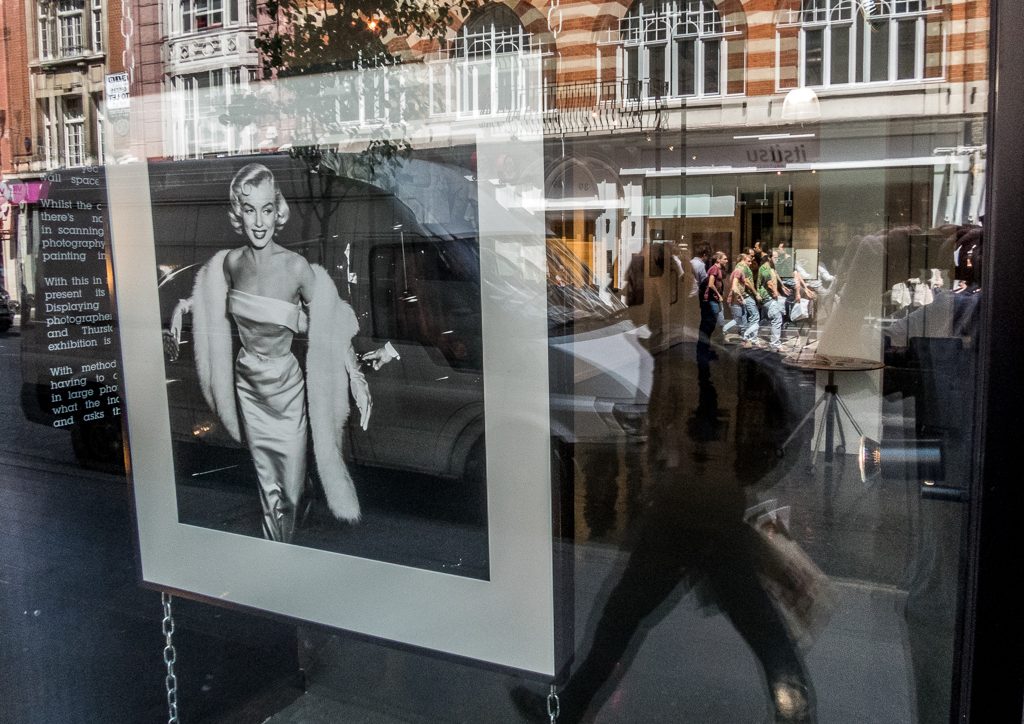
Lately because of the COVID restrictions I have had less opportunity for street photography. I don’t want to travel on a train to London, and I have decided that pubs and restaurants are off limits for me at the moment.

So I have been looking for different outlets for my photography. My first love, landscape photography is restricted because long road trips and overnight stays are out. So it is difficult to visit the Lake District and Scotland.

So I am going to go a bit abstract.

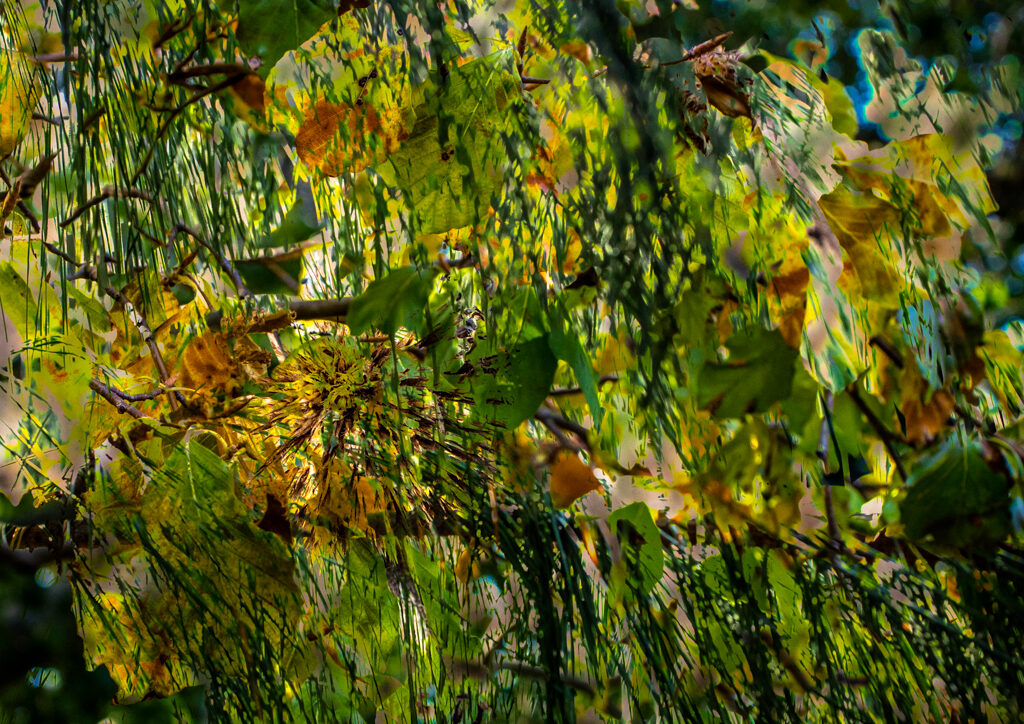
An Impression of Autumn

It is just coming into Autumn. The most beautiful time of year IMHO. The next six weeks or so are going to be just so amazing. What I want to do is photograph the leaves and the trees and the sky and capture the mood. The feeling of darkening days, and ripe fruit. Hunkering in, log fires, smoky chimney pots, mellow mists and the foreboding of winter. I want to create an impression of the Autumn I see.

As Joel Meyerowitz says:

‘Once you have a camera in your hand you have a license to see.’

Abstract allows a creative control. Some would say too much. However, the end result is unique to you. It may be crass, but it is your kind of crass. A camera can give you the license to see, but abstraction gives you the freedom to feel and express emotion.
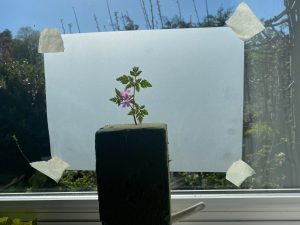
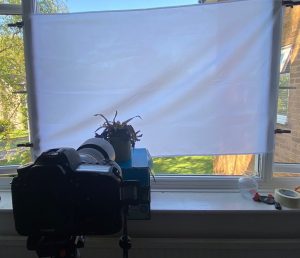
Multiple Exposures

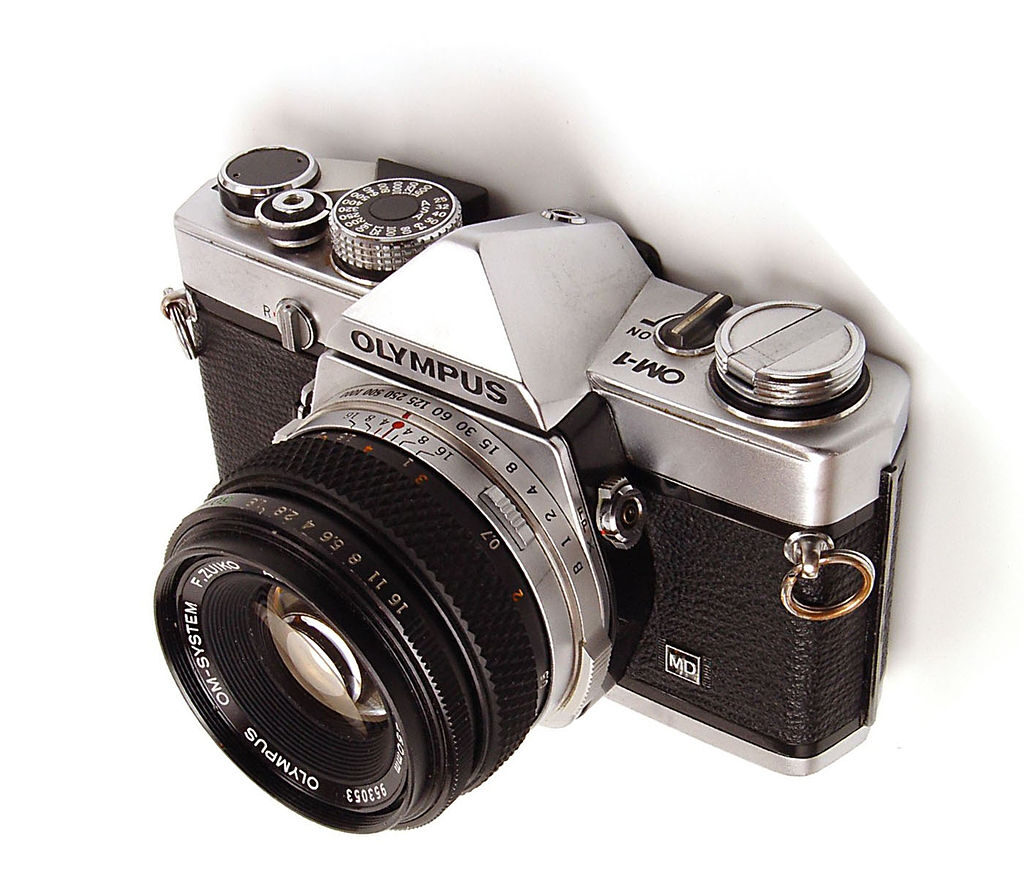
One of the most accessible ways of going abstract is to find the multiple exposure function on your camera. With this, you can create stunning abstracts in camera.

There are numerous videos that go into the technicals of ‘how to’ like this one.

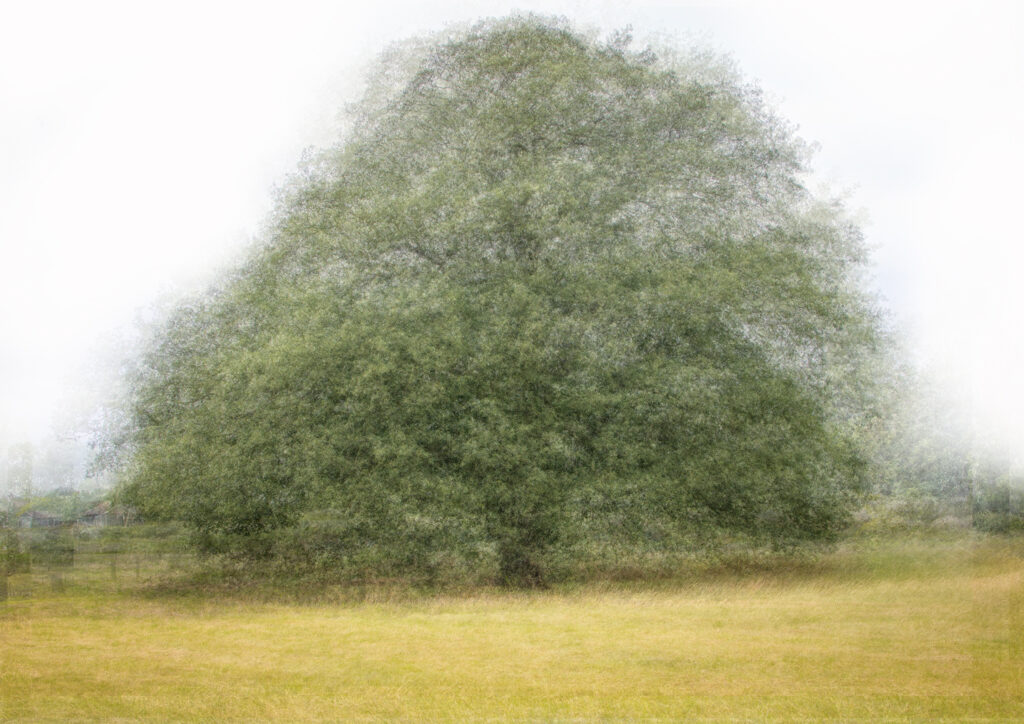
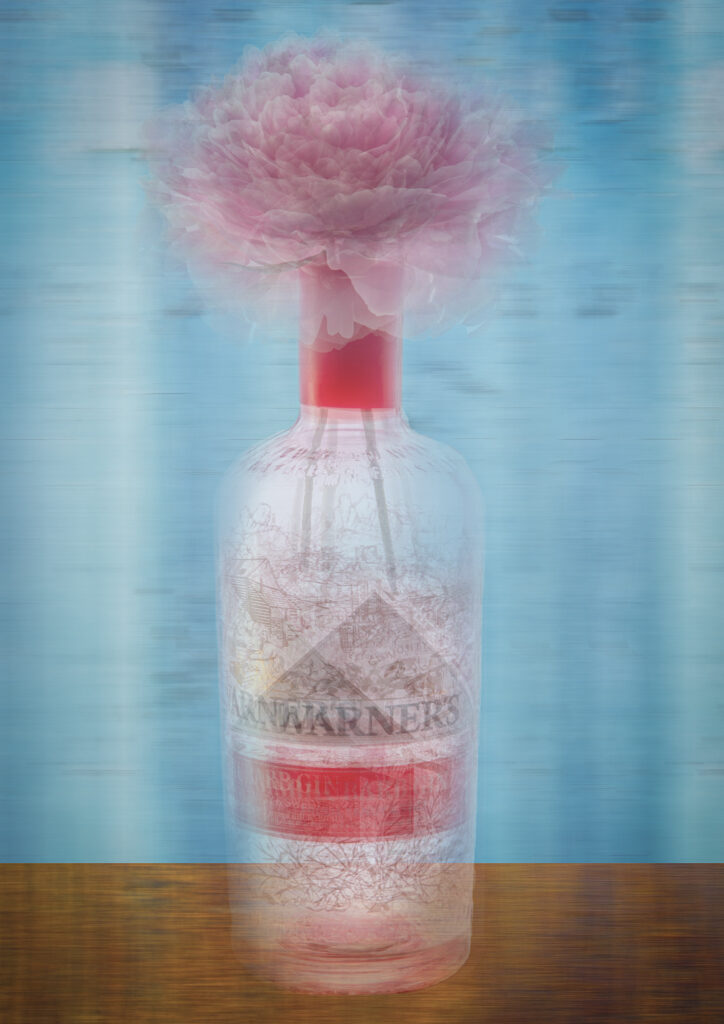
You take several different images. These multiple exposures are then stored in the camera and merged to create a final image. Sounds complicated and technical, but it is not that difficult. Just have a go and experiment. Take 2, 3 or more images stacked on top of one another. See what works and carry on.

The most difficult part is finding Multiple Exposure on your camera’s menu!

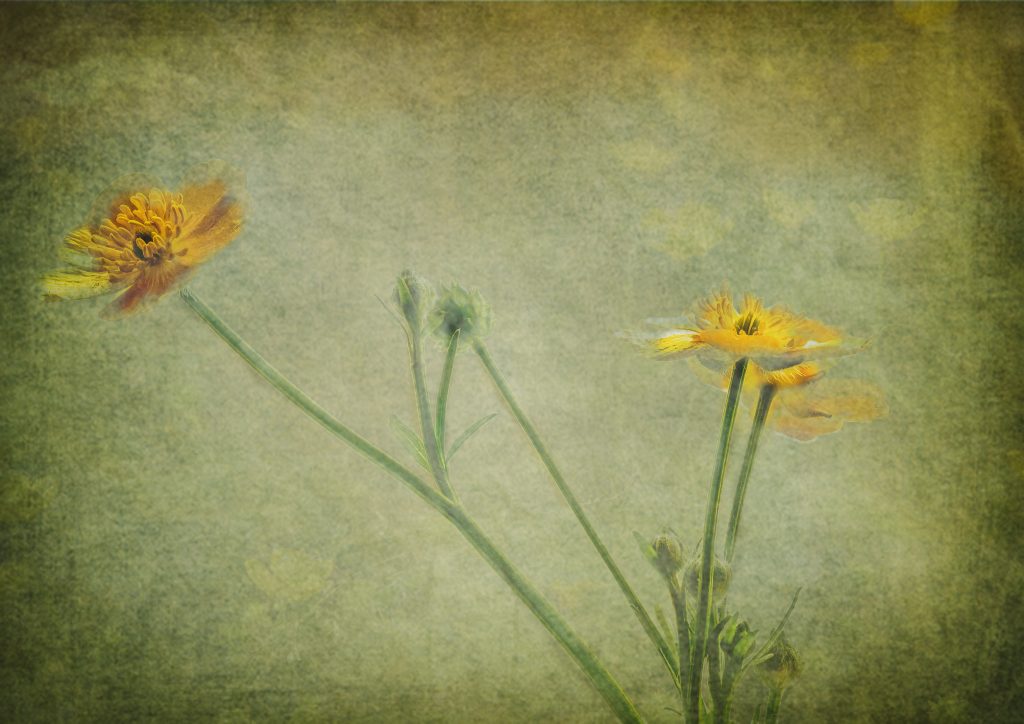
The example above was taken in my local park. There are three exposures. Lengthening shadows on a white wall, autumn leaves and pine needles.

I think I will print my Autumn Abstracts. Stick them on a wall and then the next six weeks will be with me all winter

To see what you can achieve with this technique. Look no further than the work of Valda Bailey If you really want to get into Multiple Exposures then the Bailey Chinnery workshops are well worthwhile.

Now let’s get out there and enjoy the Autumn.

Filed Under: Creativity, Journey, Photography, Sony a6300, Visual Art Photography Tagged With: Autumn, Techniques, Visual Art

Canon R5 Reviews: 5 Things We Learnt

by John Gough

Canon EOS R5
Canon EOS R5

Reviewers are finally getting their hands on the EOS R5, the new mirrorless full frame flagship from Canon. The Canon R5 reviews are just beginning to come in (August 2020), following the release of production versions at the end of July.

We knew a lot of stuff about this camera and its sibling the Canon EOS R6 from the drip drip of information from sites like CanonRumours. Then there was the big Canon specification reveal earlier in the month, where the mind blowing features of this camera were fully revealed.

Ken Rockwell describes the full specification here.

So what have we learnt from reviewers putting the R5 through its paces in real world situations?

Canon EOS R5 Does Not Catch Fire

When we reviewed the spec’ of the Canon EOS R vs R5 vs R6 we suspected that the much trailed 8K video could cause the camera to overheat, and surprise surprise it is true.

Well sort of.

There are endless vlogs out there discussing whether the R5 overheats when shooting 8K video.

Tony Northrup got heated about the issue in this video

However, it was followed by a disclaimer in this video, because it turns out that it was the CFexpress card that was to blame?

This article from canonwatch confirms there is no issue. Personally, I think it is irrelevant. The only time I would be likely to use 8K video, would be if I caught sight of a unicorn.

The video from Tony Northrop, however, does confirm that the quality of the 45MP sensor on the R5 blows the competition out of the water. Especially at low light and in terms of dynamic range.

Talking of water.

Weather Sealing: How Good is Good?

Weather sealing is too often taken for granted. We are told the weather sealing on the R5 is good, but how good? There should be a weather sealing standard. Then we could properly compare cameras and lenses.

However, this video from the excellent Chris Niccolls at DP Review describes that the weather sealing on the R5 is equivalent to the Canon EOS 5D IV. Now that is good. The 5D IV should represent the gold standard. I have friends who are landscape photographers who stand out in all weathers with their trusty 5D IV. I have yet to hear any complaints.

Of course, Chris has not tested the camera in a shower, but then it does cost over £4000.

Shoot 8K Video Stills

We thought it was theoretically possible to get decent still pictures from a burst of 8K video, but Digital Camera has proved that on the Canon EOS R5 it really works.

Not much has been said about the Frame Grab function. but on the R5 it is possible to flip through the 8K footage in camera. Highlight the frame required. Then select and produce a 35MP image.

Digital Camera was very impressed with the quality of the image. The downside is that it is a JPG, so there are not the opportunities to process shadows and highlights in post.

There are not yet any Canon R5 reviews that demonstrate this feature working. However, it is important because this could fundamentally change photography in the future.

Imagine a time when photographers use video stills rather than photographed stills. Imagine a time when an AI algorithm selects the video still on your behalf.

The R5: Balanced on a Gimbal

The in body stabilisation (IBIS) on the R5 has been tested and applauded by many reviewers. IBIS works with lens optical stabilisation to achieve 8 stops (Canon claim). Testers have found that although it may be difficult to achieve that exact spec’, the system works well. Down to 1/4 of a second they say.

To see how well. The gimbal comment came from this video from no life

Shoot Like a Wildlife Photographer

It goes without saying that the R5 autofocus has face and eye detection. Afterall that is available on the Canon EOS R (with the latest firmware upgrade).

Animal eye detection, however, is a whole new ball game. Canon has used Deep Learning to ‘train’ an algorithm how to recognise animal eyes,

“It’s been taught,” explains Mike Burnhill, technical support manager for Canon Europe. “You put it into a computer, it creates the algorithm that’s then loaded into the camera. So it’s different from AI – AI is a continual learning; deep learning is basically, it teaches itself, and gives you an end result that is then loaded into the camera.” 

The result has been tested by Jared Polin at FroKnowsPhoto.

This amazing video demonstrates how the R5 can track and lock on to an animal eyeball It is truly incredible. I have seen a video with it working on fish!

What’s Next?

This camera is a bridge between the mirror up traditional DSLR and mirrorless cameras. Canon obviously see their future as mirrorless. They will not want to continue to develop both systems.

The R5 will tick most boxes for most professionals, and Canon will want to see them beginning to make the transition. As professionals change, the enthusiast market will follow.

This is an important camera for Canon.

Filed Under: Cameras, Canon Cameras, Canon EOS R, Equipment, Gear, Journey Tagged With: Canon Cameras, canonr5

Canon EOS R vs R5 vs R6

by John Gough

Canon EOS R5
Canon EOS R5

Canon with great fanfare announced two flagship cameras last week. The Canon EOS R5 and the Canon EOS R6. They join their range of mirrorless full frame cameras which include the Canon EOS R and EOS RP. The R5 and R6 are not on sale yet but are available for preorder.

We ask which would you choose when selecting between the Canon EOS R vs R5 vs R6

Would You Preorder?

Both new cameras are available for preorder before the cameras go on sale at the end of the month. (July 2020). Unusually the cameras have not been available to independent reviewers. There is now some suspicion that Canon may have launched too early and there is now some kind of hitch, but that aside.

Would you preorder the R5 or R6 just based on what we know about their specification?

Furthermore, if you were already a Canon EOS R user would you preorder and replace your existing camera?

Specification: Canon EOS R vs R5 vs R6

The new EOS R5 and R6 certainly have some brilliant new features. 8K video is the big new innovation on the R5. No other camera has this. Remember though, I will be looking at these cameras as a stills photographer who does a little bit of video.

Canon EOS R vs R5 vs R6

Processor

The R5 has been described as a computer with a lens. Certainly, the new DIGIC X processor will have to be beefy to handle 8K video. Whether it can do so without overheating? We await the reviews to find out.

Sensor

The EOS R seems to be the Goldilocks of the three cameras, with a sensor that is neither too big nor too small at 30MP. The RAW files from the R5 45mp sensor could be too big for many workflows. This may mean upgrading hardware. The smaller 21MP sensor on the R6 is after all a similar sensor to the Canon 1D X III, which has worked well for thousands of professional photographers.

In Body Stabilisation

Motion sickness is when you pull up that special shot in Lightroom only to find that there is camera shake. Stabilisation has been on lenses for years, but now Canon has a system on the EOS 5 and 6 that can provide 8 stops of compensation, by combining both systems. Handheld shots at low shutter speeds will now be even more possible and passable.

AF

Following the firmware upgrade to the EOS R. All three cameras now have similar face and eye AF detection capability.

Shoot in the Dark

The low light performance of the EOS R was already impressive at EV-6. The EOS R6 takes that a tad further to EV-6.5, coupled with an impressive maximum ISO of 102400. Add in IBIS, and the EOS R6 really can shoot in the dark.

EVF

Could it be that eventually, an electronic viewfinder will see the world more clearly than a traditional DSLR via mirror and prism? It must be getting close with the impressive 5.69 million dot resolution on the miniature OLED display on the R5.

Video Replaces fps.

Is video now good enough for stills? The 8K video on the R5 could be the biggest game changer for photography this decade?

Each frame in an 8K video is a 35 megapixel still image.

The fps on the R5 and R6 are impressive especially for sports and wildlife photographers. However, why not take a burst of 8K video and choose your optimal image from hundreds of frames. This is possible on the R5 which has a frame grab function that enables you to take high-resolution 35.4MP stills from 8K footage.

How well will this work? Again we await the reviews.

Card Slots

The EOS R has just one card slot. This was a contentious issue when the camera was first launched. Canon has however made amends. The R6 now has 2 SD card slots. The R5 has an SD card slot and a CFexpress card slot. A CFexpress card is however very expensive, a 256GB card could set you back £500.

Decision: Canon EOS R vs R5 vs R6

If I was choosing which camera to buy based on price, then the R wins hands down. It may be a couple of years old, and although it started out a bit shakily because it was a revolutionary step for Canon, it has now become a favourite of many photographers. If you are not bothered about IBIS. Plus if you can survive with just one card slot. Then the R is the choice.

What though if you already have an R and are looking to upgrade? Is it the R5 or the R6? There is no doubt that if you are a stills photographer, if you go for the Canon EOS R5, you are buying a lot of video capability that you may not need.

However, if you are a wildlife or sports photographer then the 8K to stills option on the R5 may be revolutionary. If that works it would make the R5 a worthwhile purchase.

If you go for the Canon EOS R6 you get most of the spec of the R5 but without the video capability. Although the sensor is smaller than the other two. It is a proven performer from the Canon 1D X III, but without the workflow concerns of the 45MP sensor on the R5.

For a photographer rather than a filmmaker. The R6 has a lot of photography capability, for two thirds the price of the Canon EOS R5. We await the reviews but the Canon EOS R6 is the choice.

Filed Under: Cameras, Canon Cameras, Canon EOS R, Gear, Journey, Mirrorless Tagged With: Canon Cameras

Pep Ventosa Technique

by John Gough

Pep Ventosa Technique
Tree in Midsummer / John Gough / Canon EOS R

Pep Ventosa is a Catalan photographer who is known for his technique of creating impressionistic looking photography by taking multiple images of a subject and blending them together.

His series ‘In the Round’ featured trees which have become the lynchpin of his work. His photography, however, is now more diverse and includes urban landscapes, streetcars and street lamps.

When talking about his work he describes how:

The process mimics how we actually see: the eyes are constantly focusing on the specific details and elements of what’s in front of them and the brain then processes that visual information making the reconstruction so we perceive the world around us.

I have curated a selection of his images here.

The Pep Ventosa Technique

Pep Ventosa uses hundreds of images to create an artwork. Is it art or is it photography? He purposefully blurs the boundaries. Look at his series ‘New Faces from the Past’

Trying to replicate the technique is not easy. As my attempt above illustrates. It is not just a process of walking around a tree, taking photographs and putting them into layers in Photoshop.

A good place to start is with the glorious Glenys Garnett

Tips to Creating a Masterpiece

  • The subject has to be interesting enough to be deconstructed
  • Maintain a reference point on the subject for all the images. For example, I used the tree trunk in the image above. A 3×3 grid in the camera viewfinder is useful.
  • A wide angle lens is best to allow you to get closer to the subject.
  • I took twenty images in the image above.
  • Take jpgs rather than RAW to make it easier to manipulate later. Or do as I did convert them to jpg in Lightroom. Create a similar look and feel for each image and then export to Photoshop.
  • To transfer from Lightroom to Photoshop in one step. Select the images to be transferred in Lightroom: Photo>Edit In>Open as Layers in Photoshop.
  • In the layer stack in Photoshop I used a Normal blending mode with an opacity of 20%. The blending modes and opacity, however, depend on the effect that YOU want to produce.
  • Try keeping the camera fixed and moving the subject see below.
Pep Ventosa Technique
A Peony in a Gin Bottle / John Gough / Canon EOS 6D

Your Own Style

What is exciting about using the Pep Ventosa technique is that so much is down to trial and error, which means that your images will develop into your own style.

Filed Under: Creativity, Journey, Photography, Photography Techniques, Photoshop, Visual Art Photography Tagged With: Pep Ventosa, Techniques, Visual Art

Olympus has Fallen

by John Gough

Olympus has decided to get out of the camera market by selling off its imaging division to an investment fund, Japan Industrial Partners. JIP is the company that purchased the VAIO computer business from Sony.

Olympus blame the severe decline in the digital camera market, for the demise of their business. The Olympus imaging division has not made a profit for the past three years.

Smartphones Replace Cameras

The writing has been on the wall for some time. It was inevitable that eventually, smartphones would eclipse camera sales. Smartphones have now replaced compact cameras to become the camera of choice for most people. The technology employed by Apple, Samsung and Huawei now far exceeds that of many camera manufacturers. Due in part to their adoption and development of computational photography

Beautiful Cameras

Olympus have during their 87 years in the camera business created some iconic cameras.

The beautiful, compact SLR film camera, the OM1 (above) was used by many famous photographers during the 1970’s. Including David Bailey, and Don McCullin.

The PEN-F series is a film / digital camera with a history and timeless design, very much like the Leica. Now would be a good time to snap up one of these beauties.

Olympus The End

Olympus and JIP plan to sign a definitive agreement by the end of September, with the deal expected to close later this year. Financial terms of the acquisition haven’t yet been made public.

Filed Under: Gear, Journey Tagged With: Olympus Cameras

Free Textures: 5 Best Sites

by John Gough

Poppies (with free textures) / John Gough / Canon EOS R

Where can you find free textures, to use with Photoshop to add interest to your images?

Adding textures can lift your image from a straightforward photograph into the realm of digital artwork. If you have never tried it before then a good place to start is this YouTube video from Photoshop Cafe.

When it comes to finding textures there are three options: make your own. Purchase textures, I have bought textures from Sue Woollard, because they particularly suit flower photography. Or download textures that you don’t have to pay for.

Over the years, I have come to rely on these five sites to download textures for free.

Freestocktextures.com

Huge range of textures at this site. These are free to use commercially. There is a limit of 5 downloads a day, which increases to 50 downloads a day if you create an account. Which again is free. freestocktextures.com

Unsplash.com

Unsplash is a site where photographers can upload photographs which in turn can be downloaded for free. There is a massive range of images on this site, which are free to be used commercially. This site is a photographer’s exchange so why not submit pictures as well as download. Go to the site and search for textures there are hundreds to choose from. unsplash.com

Pexels.com

Pexels is another community site. You can. You don’t have to. Upload images and you are free to download images. The images can be used commercially. You can credit the photographer, but it is not necessary. There are many different texture categories. pexels.com

Texturify.com

This is as its name implies is a site dedicated to textures and they are all free. The site was created for CGI designers who require different backgrounds for animations, films and games etc. However, it is a great resource for photographers. So on this site, there are less abstract textures and more actual photographs of metal, wood, brick and concrete etc. The images are free to use even commercially. texturify.com

Flickr

Flickr was one of the first photography hosting sites. This has now grown into a vast photography community with millions of accounts and billions of photos. As a result, the site can be an excellent source of imagery. Photographers have posted thousands of textures which are fully downloadable. Search for textures, and use the dropdown on the top left to refine by the type of licence. There are over 300K images with no known copyright restrictions. flickr.com

There are lots of other ‘free’ looking sites out there, but they often come with a sting in the tail, to part you from your money

Free Textures: Tips

Textures in Photoshop

There are textures available to use in Photoshop, but they are difficult to find. Go to Window>Extensions>Adobe Paper Texture Pro

Changing Texture Colour

Keep the texture but change the colour. It is often useful to be able to take creative control of the colour. Here is how in Photoshop.

  • Open the texture image.
  • Turn the image to monochrome: Image>Adjustments>Black and White>OK.
  • Adjust to reveal the texture: Image>Adjustments>Brightness/Contrast – bring the brightness up and take the contrast down >OK
  • Change colour: Image>Adjustments>Hue and Saturation>tick Colorize – change the colour using the sliders >OK

My Library in Photoshop

To store textures in Photoshop try using Libraries. Window>Libraries.

Filed Under: Journey, Photography, Photoshop, Post Processing, Visual Art Photography Tagged With: Post Processing

How to Achieve an LRPS

by John Gough

Marilyn / John Gough / Canon EOS M3

I recently gave a presentation about How to Achieve an LRPS.

It pulls to together some of the advice on these pages i.e 5 Tips for Passing an LRPS and LRPS One Big Tip. However, I included more about how the LRPS is assessed in this presentation. Using the criteria:

Technical Quality: depth of field / exposure / sharpness / colour rendition / processing faults

Visual Awareness: use of light / composition / viewpoint / post processing / use of colour

Communication: point of interest / creativity / decisive moment

Overall Impression: cohesive panel / printing and mounting / avoiding repetition / panel layout

RPS distinctions are too often seen as stuffy and unobtainable. However, if you are a good photographer the LRPS is achievable. It is hard work, and you will need the skill, but it is worthwhile.

It is also a great project, and projects are important in photography. Pursuing a project can push your boundaries, and get you out of your photography comfort zone. It will also develop your own creative persona and style.

The LRPS can be the start of an enlightening personal journey.

You are welcome to download How to Achieve an LRPS.

Filed Under: Journey, LRPS, Photography, RPS Tagged With: LRPS, RPS Distinctions

Glenys Garnett

by John Gough

I have long been a fan of Glenys Garnett, her creative flower photography and landscape work are an inspiration.

RPS Virtual Events

I mention this because the RPS is hosting a virtual event where Glenys will be talking about creative landscapes. It will cover:

In this 60 minute presentation Glenys Garnett will give you some overview and insight into her approach to capturing and creating landscape imagery. She will share her influences and the techniques she uses both in-camera and in Photoshop to show how she goes about creating her composite landscapes.
Glenys will also explain the tools you need to make a start in developing your own creative images.

The RPS is also running an online workshop where Glenys will be talking about Making Creative Landscape Images. It is restricted to six people only, but I have written to the RPS to try and make the recordings available.

Links to the Work of Glenys Garnett

Meantime if you want to follow Glenys and sample her wonderful creative images, find her Twitter feed. There are new wonderful photographs almost every day.

To see her work I have created a Pinterest board, but it is just a sample of her vast output.

Glenys is also very generous in sharing her techniques and knowledge. You can subscribe to her YouTube feed here.

One of the things I been practising during the lockdown is to imagine a scene and then to attempt to create it. This has been more relevant during these times because our freedom of movement has been curtailed. Choosing a location, turning up and hoping an opportunity will present itself is no longer so accessible. This has made me look inward more and create with what is available.

With this in mind, as we come out of lockdown. I am going to take time to study these tutorials on YouTube and the RPS, in the hope that I can share in some of the Glenys Garnett creative magic.

Filed Under: Creativity, Journey, Photographer, Photography Tagged With: photographers

Your Canon Camera as a Webcam

by John Gough

Your Canon Camera as a Webcam

Canon has launched a new piece of software that will enable your Canon camera as a webcam.

We are all spending more time on Zoom and Skype both for work and social interaction during lockdown. Usually, we rely on the tiny camera on our laptop, but what if we could use our DSLR?

Well if you have an EOS or Powershot camera you can. This is because Canon has released, EOS Webcam Utility Beta, and with this software, you can use your Canon camera as a webcam. Initially, the software is just for Windows 10.

According to their press release:

“In unprecedented times, it’s imperative for Canon to provide our customers with useful, simple and accessible solutions to assist them in whatever imaging needs they have,” said Tatsuro “Tony” Kano, executive vice president of the Canon U.S.A., Inc. Imaging Technologies & Communications Group. “Our goal is that the EOS Webcam Utility Beta software can help reduce some of the remote workday stress for employees who are tasked with video conferencing and virtual meetings.”

I have a desktop PC that I use for photo editing and a laptop that I use for Zoom because it has a camera and mic. However, now that you can use your Canon camera as a webcam, I have decided to add Zoom to my desktop. I am now setting this up using my Canon EOS R, and I will take you through my experience step by step. This guide, however, should work for any Canon camera on the list below.

Which Canon Camera can be used as a Webcam

Canon Camera as a Webcam. Source: DPReview

Where to Download the Software

Download the software required on your PC from here. There is a link on this page for each supported camera. It is easy to download. Remember to restart your PC after the download.

Accessories Required

You will need a USB type-C cable. There should be one in the box if you purchased a Canon EOS R. However my desktop computer does not have a USB-C port. So I purchased a USB type-C to A cable.

Purchase this from Amazon here in the UK and here in the USA.

A small stand for the camera is useful. I purchased this Z flex stand which has not been off my camera since I bought it because it is so useful for those lockdown still life projects.

In the USA a similar stand is:

As my desktop did not have a microphone so I purchased this:

In the USA it is here.

Setup the Canon Camera as a Webcam

Once you have downloaded the software connect the camera to the computer via the USB cable.

Turn the camera on, and turn to Movie Mode. This can be set with the camera’s Mode Dial.

If you have not used the Movie Mode on a Canon EOS R before it may be hard to find. This is how I found it.

Open your conferencing app e.g Zoom or Skype and choose “EOS Webcam Utility Beta” as the video feed.

Connect your microphone. NB there is no audio feed from the camera.

Troubleshooting

It is likely that the video conferencing will not work and you get this screen.

This is because you have EOS Utility running which is intercepting the video feed.

If you do not use EOS Utility go to Settings>Apps on your PC and uninstall. If you use the EOS Utility software right click on the systems tray, choose Task Manager and right click to end the task.

I found this fix here So cheers Tech Gear Talk

Resources

A Canon forum where users share feedback.

Canon download and installation instructions

YouTube video with installation instructions from Canon

Have fun.


Camera Wrist Strap

I have avoided dropping my camera so many times using a simple inexpensive wrist strap like this one. Cameras and expensive lenses do not bounce!

UK

USA


Filed Under: Canon Cameras, Canon EOS R, Gear, Journey Tagged With: Canon Cameras

Building a Lockdown Lightbox

by John Gough

I like to shoot flowers backlit. Like the buttercups in the image above. This was achieved using natural light through a window lightbox.

Now that we are all restricted from roaming around with our camera, the spring flowers in our gardens make fascinating subjects. With a little post-processing in Lightroom and Photoshop, simple blooms can blossom into fine art.

Over the next few blogs, I will be explaining just how I approach flower photography, starting with how to build a simple window lightbox.

Simplest Simple Window Lightbox

The simplest way to create a uniform lighting effect is to simply stick a piece of tracing paper or baking parchment on a window. Mount, the flower in front of it and take a photograph. Job done.

Simplest Lightbox

I use oasis to mount the flower, which can be purchased from Amazon.

UK

Simple Lightbox

As my flower photography has evolved I have created a more elaborate window lighting setup, but it still uses natural light.

As I will explain in a later episode. Cutting the flower from its background in Photoshop is best achieved with as white a background as possible. So I now use a white diffusion fabric which I clip to a window using studio clips.

Both items can be bought quite cheaply from a photography store or Amazon.

UK

UK

I usually pick flowers from my garden, or purchase them from a florist. I certainly avoid picking flowers from the wild. Bringing flowers indoors and photographing in a ‘studio’ environment gives ultimate control over the image.

Over the next few weeks I will be working through the process I use to create fine art flower images. This is episode 1.

Camera Wrist Strap

I have avoided dropping my camera so many times using a simple inexpensive wrist strap like this one. Cameras and expensive lenses do not bounce!

UK

USA

Filed Under: Flowers, Journey, Painterly, Photography, Visual Art Photography Tagged With: Painterly, Projects, Visual Art

« Previous Page
Next Page »
Copyright: John Gough 2025